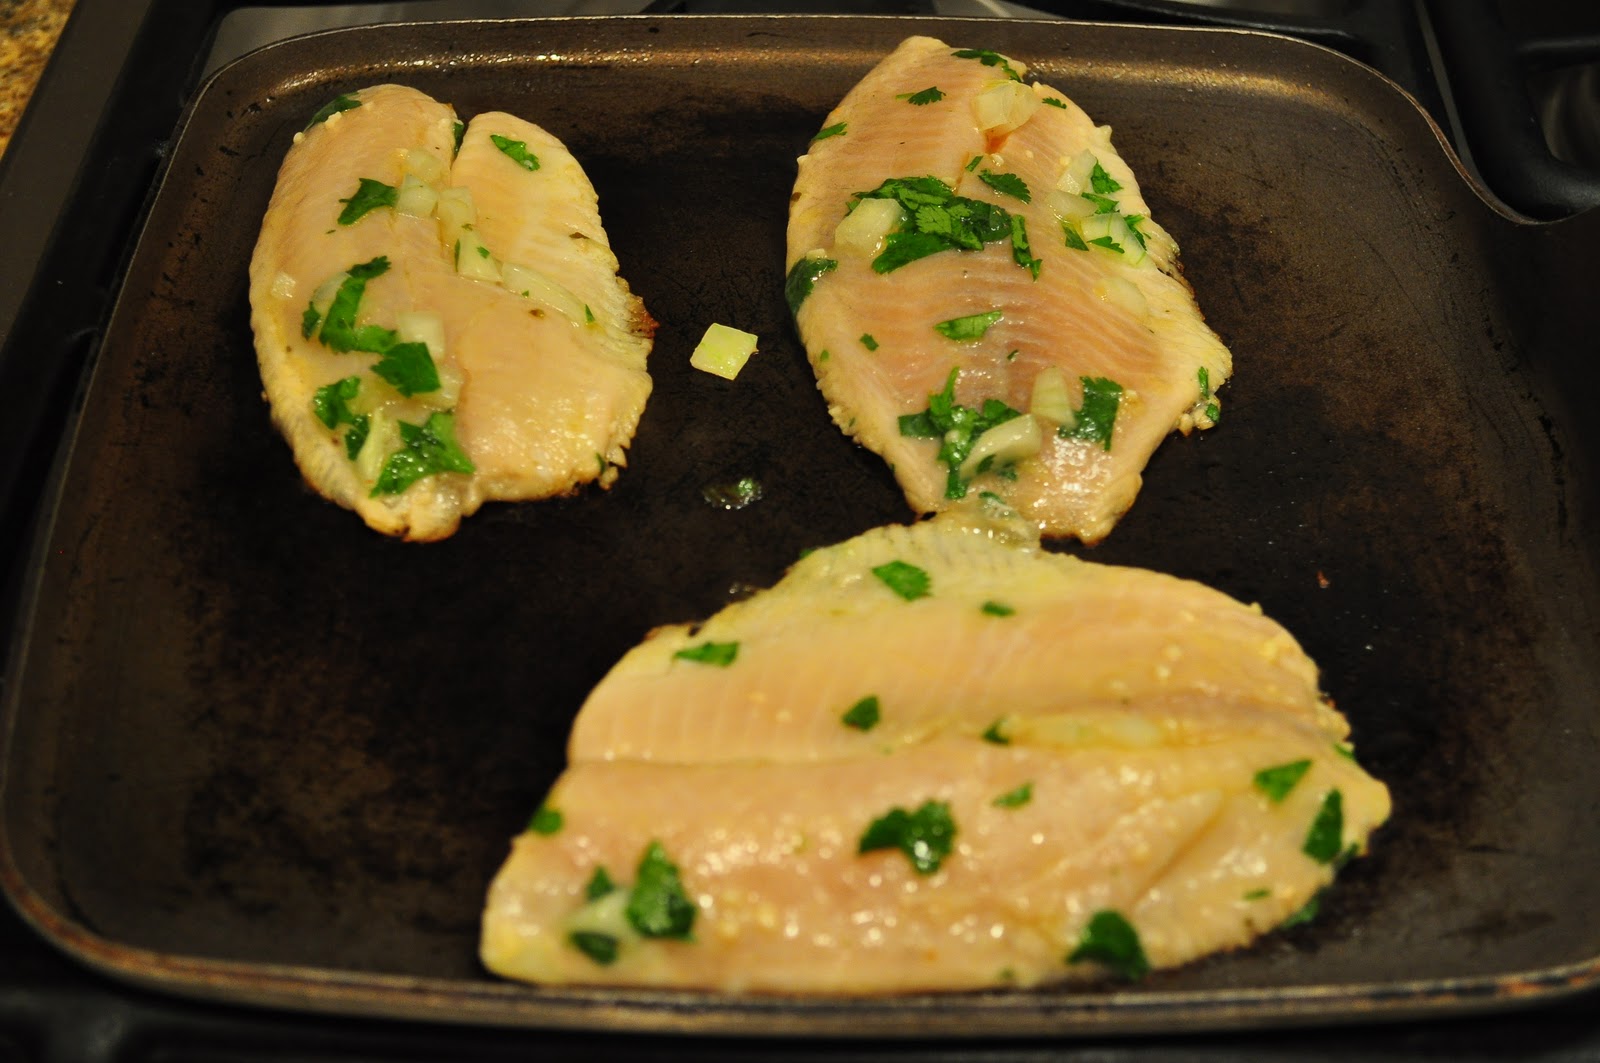
Typically made with fried fish, this grilled fish variety makes for a lighter version of a delicious mexican inspired taco that always makes me think of San Diego. We had some tilapia in the freezer and what better way to utilize it than with some cilantro, lime juice, and avocado?
You can marinade your fish with whatever you like, but I opted for my standard ziploc bag filled with diced white onion, chopped cilantro, olive oil, lime juice, orange juice, garlic, oregano, salt, and pepper. Throw your fish in, put in the fridge and let it sit for 30 minutes to several hours.
Next, prepare your grill. If you aren't using a grill, go for a grill pan. If you are lacking a grill pan, a flat skillet works well too (what I used in this case). Add a little oil to the skillet and throw on your tortillas. We opted for small corn tortillas, since these are soft tacos, but if you want flour or crunchy taco shells, by all means, do your thing, but I highly endorse soft tortillas for this meal.
While these are grilling I made a lime mayonnaise with 1 cup mayo, 1 tsp milk, 3 tbsp lime juice, and a dash of the fresh cilantro. Remove your heated tortillas from the grill/skillet and coat with your desired amount of lime mayo.
Next, grill your fish on the same pan, with a little excess marinade still suck to the fish. I'm not really a fan of patting dry, because I don't want to lose the extra flavor.
Since tilapia is a very thin white fish, it will cook rather quickly. Turn after a couple minutes on one side, and once done, you can break it into smaller pieces to fill your tacos. I arranged the sliced lettuce on the bottom of the tortilla, topped with the fish, added some fresh avocado, drizzled with about a tbsp of the leftover marinade from the baggy, and topped with a little bit more of the lime mayo.
Simple, delicious finger food that makes for a good lunch or dinner.
Chronicling my daily meals to showcase recipes, techniques, and restaurant fares. This is a blog to explore my love of all things edible and the processes behind them.
Showing posts with label lime. Show all posts
Monday, January 16, 2012
Sunday, October 9, 2011
Rice and Beans
This was one of those "what can I throw together with existing ingredients, but that is very dense because I'm very hungry" meals. Lacking tortillas, I figured I could make what I would normally put in a burrito, but eat it like a stew-y mush.
Rice and beans. A good starting point. I only had brown basmati rice, though, so we'll call this a bit of a fusion dish. Basically I cooked the rice according to the directions. In a separate skillet I heated a little olive oil to cook the garlic and onions. Then I added a can of black beans, which I partially drained. As the beans cooked, the liquid diminished, so I thought I'd maybe treat this like a black bean soup, and I added some chicken broth, which too cooked off eventually. I added the sliced chicken to basically poach in the liquid, and once no longer pink I added the rice. I now had a soupy mixture, so I added the juice of 1/2 a lime and cooked until the liquid was reduced completely (only about five minutes or so). To finish it off I added a bunch of fresh cilantro and scallions, poured it in a bowl, and melted some cheese on top. It definitely did the trick and filled me up.
Monday, October 3, 2011
Spiced Shrimp with Avocado Corn Salsa
My friend hosted a dinner party last weekend and I volunteered to bring an appetizer. The entree was turkey chili, so I wanted something that could compliment that and provide a little something different. Now I'm embarrassed to say I did not take a picture of my finished product (mostly because it was in her kitchen surrounded by people I just met and I didn't feel the need to whip out my camera to document a bowl of shrimp). So here's a stock photo from the internet, but if you look below you can see the blurry image of my bowl of salsa with shrimp dangling around the rim!
Look at that lovely bowl of appetizer holding it's own amidst a sea of lavish tableware. Ok, enough about my lack of photography, here's how you make it.
Take your raw, peeled, deveined, butterflied jumbo shrimp and put them in your dry rub with a little olive oil and garlic. I used cayenne pepper, paprika, ground coriander, dried oregano, cumin, pepper, diced garlic, extra-virgin olive oil. Toss the shrimp to coat and place in the fridge until ready to grill (at least 30 minutes).
Look at that lovely bowl of appetizer holding it's own amidst a sea of lavish tableware. Ok, enough about my lack of photography, here's how you make it.
Take your raw, peeled, deveined, butterflied jumbo shrimp and put them in your dry rub with a little olive oil and garlic. I used cayenne pepper, paprika, ground coriander, dried oregano, cumin, pepper, diced garlic, extra-virgin olive oil. Toss the shrimp to coat and place in the fridge until ready to grill (at least 30 minutes).
Next prepare the salsa. Dice your red onion and tomato first. Then add your corn and chopped scallion. I added the avocado, cilantro, and lime juice last, so as to avoid browning of the avocado. Again, toss to coat and store in the fridge until ready to serve.
I brought the uncooked shrimp and salsa to the dinner party and grilled the shrimp on the stove there. You don't really need to oil the skillet since there's oil in the shrimp marinade. Using tongs and a grill pan, cook about 2-3 minutes on each side until the shrimp is cooked through. Arrange shrimp surrounding the salsa. Rather than scoop the salsa with the shrimp and eat with your fingers, I recommend a fork. The spiciness of the shrimp coupled with the cool and citrusy salsa make for a perfect pairing, and also go nicely before a hearty turkey chili.
Sunday, July 24, 2011
Black Bean, Corn, and Tomato Salad
This salad fix I seem to be on is getting a little out of hand (yes, 2 salads constitutes a fix). This one was made for a picnic and was primarily consumed atop chips, like a salsa. It's one of my go-to picnic dishes because it's quite simple.
Combine 1 can black beans, 2 diced fresh tomatoes, 1 cup corn kernals, 3/4 cup diced red onion, and 1/2 cup loosely packed chopped cilantro. Now again, I never measure these recipes, so that's approximate. Add more or less of the items you like.
For the dressing I add a little cumin and coriander (probably about 1 to 2 tsp worth of each) and fresh lime and lemon juices. Just enough to coat the salad but without leaving a puddle of juice in the bottom (probably 2 to 4 tbsp total citrus juice). And that's it! Toss and serve.
Pro tip - I do find that the juice from the can of beans and the freshly chopped tomatoes can accumulate in a less than desirable fashion. To deal with that, I poured the beans and chopped tomatoes into a sieve while I cut the onions and cilantro. I was amazed by how much liquid dripped into the sink, but I find that the extra five to ten minutes I allowed for drainage really improved the overall taste and texture of this salad later.
Combine 1 can black beans, 2 diced fresh tomatoes, 1 cup corn kernals, 3/4 cup diced red onion, and 1/2 cup loosely packed chopped cilantro. Now again, I never measure these recipes, so that's approximate. Add more or less of the items you like.
For the dressing I add a little cumin and coriander (probably about 1 to 2 tsp worth of each) and fresh lime and lemon juices. Just enough to coat the salad but without leaving a puddle of juice in the bottom (probably 2 to 4 tbsp total citrus juice). And that's it! Toss and serve.
Pro tip - I do find that the juice from the can of beans and the freshly chopped tomatoes can accumulate in a less than desirable fashion. To deal with that, I poured the beans and chopped tomatoes into a sieve while I cut the onions and cilantro. I was amazed by how much liquid dripped into the sink, but I find that the extra five to ten minutes I allowed for drainage really improved the overall taste and texture of this salad later.
Thursday, July 14, 2011
Cilantro Lime Soy Marinated Beef Strip Stir Fry over Couscous
I had some beef tips in the freezer that I bought for the sake of stir frying at some point. Not feeling too inspired to do a typical teriyaki beef over white rice, I decided to change it up with some couscous and a marinade with a bit of a bite. The couscous cooks in five minutes according to package directions, and the stir fry is very quick as well. Here's what I used.
Marinade - Soy Sauce, Sesame Oil, Lime Juice, Fresh Cilantro
Veggies - Zucchini, Mushrooms, Onions, Garlic
Marinade - Soy Sauce, Sesame Oil, Lime Juice, Fresh Cilantro
Veggies - Zucchini, Mushrooms, Onions, Garlic
The glamorous start to this meal is the act of marinating the meat in a plastic bag. I used about 3 tbsp soy sauce, 1 tbsp sesame oil, 1 tbsp lime juice, 1/4 cup chopped fresh cilantro.
While that sits we prepare the veggies. I heated some olive oil and added the garlic and onions. Now tell me, would this be a legit stir fry without a wok? I think not.
Rather than throwing all the veggies in at once, start with the ones that take the longest to cook/soften and work your way forward. That means the zucchini was next up.
Followed by mushrooms.
And last, but not least, your meat.
As it cooked I added more cilantro, soy sauce, and lime juice because I'm a huge sauce fan and I wanted some extra to pour over the couscous. Notice I didn't add more sesame oil because it has a strong flavor and only a little was enough to achieve the effect I was going for. Cook until your meat reaches your desired doneness, plate your couscous with stir fry on top, and drizzle the extra sauce over. This was a good marinade and brought a little fusion cooking into my stir fry.
Wednesday, July 6, 2011
Shrimp Quesadillas with Mango Salsa
This was the featured dinner item at my 4th of July shindig this year. We spent all day stuffing ourselves with chips, guac, cookies, and a failed attempt at frozen yogurt, so we really weren't all that hungry. Thus something simple and quick to hold us over before the fireworks.
Sadly, I do not have any more pictures for you. So imagine if you will, a skillet on medium heat. Take your flour tortilla and place it in the skillet to warm it on the side that will be holding your fillings. Remove said tortilla and lightly butter your skillet. Place the tortilla back in the pan, this time facing the other way so the outside is cooking nicely in the butter. Having a pre warmed interior means faster cook time, which results in a less burnt exterior.
You can add your cheese almost immediately and watch it melt. I then added shrimp which I poached in chicken broth, but you can use any pre cooked shrimp you have. After only a minute or two the cheese should be mostly melted. You can put a lid over the skillet for 30 seconds or so. Then fold the tortilla over, heat about another 30 seconds, slide onto a plate, and slice into thirds.
No microwaves or toaster ovens allowed.
The salsa is much more exciting. Get a fresh mango. Chop it into small cubes. Similarly chop some red onion and cilantro. Put it all togeter with some fresh lime juice and toss to coat. Proportion to your own tastes. I had about 1/3 cup red onion, 1 1/2 to 2 cups mango, 1/3 cup cilantro, and maybe a tbsp or 2 of lime juice.
Serve as a garnish with chips, dillas, or any white fish, especially if the fish is blackened or spicy because the mango and lime provide a nice contrast.
Sadly, I do not have any more pictures for you. So imagine if you will, a skillet on medium heat. Take your flour tortilla and place it in the skillet to warm it on the side that will be holding your fillings. Remove said tortilla and lightly butter your skillet. Place the tortilla back in the pan, this time facing the other way so the outside is cooking nicely in the butter. Having a pre warmed interior means faster cook time, which results in a less burnt exterior.
You can add your cheese almost immediately and watch it melt. I then added shrimp which I poached in chicken broth, but you can use any pre cooked shrimp you have. After only a minute or two the cheese should be mostly melted. You can put a lid over the skillet for 30 seconds or so. Then fold the tortilla over, heat about another 30 seconds, slide onto a plate, and slice into thirds.
No microwaves or toaster ovens allowed.
The salsa is much more exciting. Get a fresh mango. Chop it into small cubes. Similarly chop some red onion and cilantro. Put it all togeter with some fresh lime juice and toss to coat. Proportion to your own tastes. I had about 1/3 cup red onion, 1 1/2 to 2 cups mango, 1/3 cup cilantro, and maybe a tbsp or 2 of lime juice.
Serve as a garnish with chips, dillas, or any white fish, especially if the fish is blackened or spicy because the mango and lime provide a nice contrast.
Friday, November 19, 2010
Fried Chicken Tenders
I was craving fried chicken last night after I saw a KFC ad on tv, but was too lazy to leave the house. (Because making fried chicken from scratch is clearly less involved than getting in a car and grabbing a bucket of chicken from the window.)
So there are two ways of going about pre-flavoring meat. Wet marinades or dry rubs. Wet marinades typically need to sit/soak for awhile, often overnight. Dry rubs are good to go. But I wanted a wet marinade. So thanks to the internet I found a recipe for a 25 minute wet marinade before frying. (I was mostly wary of this since even when I have marinated chicken overnight, the flavor rarely shines through the fried exterior.) And it didn't really work, but I'm ok with that because my chicken was incredibly juicy and tender.
The recipe called for soy sauce, lime juice, sugar, and dark rum. I opted for soy sauce, lime juice, sugar, sesame oil, and a splash of light rum.
While the chicken soaked I prepared the flour. On a plate I mixed flour with paprika, chili powder, onion/garlic powder, salt, and pepper. So with breading/frying, there are a couple approaches. You can dip in flour, put in an egg wash, then dredge in bread crumbs. I went for a simpler approach of dredging directly in the flour from the marinade.
From here, I put the tenders directly into a pot of oil on medium heat on my stove. The goal is to get that sizzle when you first add your chicken, but not have the oil so hot that it immediately burns the flour. You need enough time for the chicken to cook through without burning the exterior. I recommend a practice chicken tender that you cut in half when it's cooked to the color you want, and then adjusting the oil temperature/cook time accordingly.
When done frying, put on a paper towel to drain, and serve. I found that right out of the oil it was incredibly crispy and the inside was super moist. But when I ate one that had been sitting for awhile, the juice from the inside started to take away the crunch from the exterior. I'd recommend serving immediately, or being more careful to remove excess liquid before dredging in flour and frying if you want the crunch to last longest.
So there are two ways of going about pre-flavoring meat. Wet marinades or dry rubs. Wet marinades typically need to sit/soak for awhile, often overnight. Dry rubs are good to go. But I wanted a wet marinade. So thanks to the internet I found a recipe for a 25 minute wet marinade before frying. (I was mostly wary of this since even when I have marinated chicken overnight, the flavor rarely shines through the fried exterior.) And it didn't really work, but I'm ok with that because my chicken was incredibly juicy and tender.
The recipe called for soy sauce, lime juice, sugar, and dark rum. I opted for soy sauce, lime juice, sugar, sesame oil, and a splash of light rum.
While the chicken soaked I prepared the flour. On a plate I mixed flour with paprika, chili powder, onion/garlic powder, salt, and pepper. So with breading/frying, there are a couple approaches. You can dip in flour, put in an egg wash, then dredge in bread crumbs. I went for a simpler approach of dredging directly in the flour from the marinade.
From here, I put the tenders directly into a pot of oil on medium heat on my stove. The goal is to get that sizzle when you first add your chicken, but not have the oil so hot that it immediately burns the flour. You need enough time for the chicken to cook through without burning the exterior. I recommend a practice chicken tender that you cut in half when it's cooked to the color you want, and then adjusting the oil temperature/cook time accordingly.
When done frying, put on a paper towel to drain, and serve. I found that right out of the oil it was incredibly crispy and the inside was super moist. But when I ate one that had been sitting for awhile, the juice from the inside started to take away the crunch from the exterior. I'd recommend serving immediately, or being more careful to remove excess liquid before dredging in flour and frying if you want the crunch to last longest.
Subscribe to:
Posts (Atom)