Showing posts with label sauce. Show all posts

Monday, December 24, 2012

Duck with a Plum Marmalade

We cut this recipe out of the newspaper years ago, and it is always a crowd pleaser.  Duck seems like such a decadent meat, probably due to the fatty skin, and a rich marmalade really complements it nicely.

Marmalade Ingredients: 1/2 cup diced red onion, 1 tsp minced garlic, 2 large plums diced, 2 tbsp brown sugar, 1/2 cup chicken broth, 1/4 cup balsamic vinegar, salt/pepper

Begin with the marmalade since it can be made a day ahead of time, or it can sit while you cook the duck.  Add your onion and garlic to a tbsp of olive oil to saute.
Once softened, add the plums.  Now we had trouble finding fresh plums in November, so we went with canned plums.  These work well since you're using them for a sauce as opposed to eating whole.  Don't go with dried plums.  We did find fresh pluots, which would also substitute nicely.  
After a few minutes when everything is nice and soft now, add the brown sugar then the broth, vinegar, and salt/pepper.  
One of our diners is allergic to balsamic so I cooked it with just the broth first, then once reduced, portioned some out for her and added the balsamic to the rest of the ingredients.  Cook for several minutes until the sauce is very thick...like a marmalade...that's when the flavor is strongest and the broth/vinegar are reduced enough.  
You can set aside the marmalade until ready to serve, or cook the duck concurrently, but if you cook the duck at the same time, make sure the duck doesn't finish before the sauce because either your duck will get cold, or you'll be forced to overcook it...neither one ideal.  

For the duck, season both sides with salt and pepper, heat some butter and olive oil in a skillet and add the duck breast, skin side down to begin searing.  
Cook for about 5 minutes on the skin side over medium/high heat.  There may be some splatter, so feel free to cover the pot with a splatter shield, but don't cover with a lid just yet.  Once you can see some of the meat above the skin cooking, flip the duck to heat the other side.  Cook at this point until your desired doneness.  I prefer my duck medium rare, so I char both the fat and the meat, then flip back over to the skin side and put a lid on the skillet for another 2 minutes or so to allow the heat to cook the insides.  

To serve, slice each breast and fan out the pieces on the plate.  If at this point you find your duck is undercooked, go ahead and place the slices back in the skillet over medium heat, but only heat on one side, so the remaining side stays pink, yet you maintain proper cooking.  Spoon the marmalade over the duck or to the side.  We served with rice and brussels sprouts and the marmalade tasted nice on the sides as well as the duck.  

Saturday, October 20, 2012

Lemon White Wine Chicken Over Rice

I made a thick lemon wine sauce for some chicken tenders to eat over rice pilaf.  This way it felt like the sauce had substance, but it used lighter ingredients and flavors to be a little more subtle.

First up, I sauteed my veggies (garlic, onion, mushrooms) in a little olive oil (butter works well too).
Once softened and a little browned, if there is no oil/butter left in the pan, add about a tablespoon more and add some flour (1-4 tbsp depending on how thick and what quantity of sauce you want).  This will act as the thickening agent.  Stir everything well and you've got yourself a roux.
To the veggies/roux, add your white wine.  (Broth is also acceptable, or a combination of the two for a subtler wine flavor).  I used a pinot grigio, but chardonnay works well too (just use what you like/have).
As you stir, the sauce will thicken as the wine combines with the roux.  At this point you can add about a tablespoon of lemon juice.  This is when I added my (still raw) chicken tenders, so that they could cook in the sauce, but if you feel more comfortable using precooked chicken, that is also fine.  I put the lid over this to allow the chicken to steam in the sauce and to avoid too much evaporation.
Once cooked through, I plated the rice, added the chicken on top, then continued cooking the sauce over medium heat to get it to the desired consistency.  You can add a little more lemon juice here if you want that flavor to pop out, or more wine if you lost a lot of liquid volume while cooking.  Fresh herbs (like parsley, tarragon, thyme) would be a great addition here (I added pepper and dried tarragon because I didn't have any fresh).  If you want it to be a real cream sauce you can also add maybe a quarter cup of heavy cream or a tablespoon or two of butter.  I did not do that this time.  But once I poured the sauce over the chicken I did garnish with freshly grated parmesan.

Monday, May 28, 2012

Potatoes, Shrimp, and Veggies over Rice and Lettuce

This was an interesting dinner I made about a month ago.  For some reason I was craving potatoes (well, aren't I always?), but also kind of wanted something fresh and salad-like.  So I figured I'd assemble pretty much everything fresh in my fridge on top of lettuce, but added some rice for texture and substance.  It was pretty good.

Ingredients: Romaine lettuce, tomato, cucumber, potatoes, basmati rice, shrimp, red onion, garlic, tarragon, cumin, coriander, salt/pepper, yogurt sauce to garnish

Start by peeling and chopping your potatoes.  I chopped into ~1 inch cubes, but do whatever you prefer.  Then, just as if I was preparing breakfast potatoes I cooked them in the skillet with a little bit of olive oil and added the tarragon, salt/pepper, cumin, and coriander.  Let them cook for about 20 minutes to cook through, and if you want you can periodically add a little broth that will be absorbed and soften the insides. 
Once primarily cooked, I added the red onion, a little garlic, and the shrimp to the pan.  Saute until the shrimp are pink and the onion softened.  I opted to chop my shrimp for the sake of having more shrimp scattered throughout in smaller bites.  It makes the shrimp go further.
Once cooked through you can assemble your meal.  I layered lettuce on the plate first, covered with the rice (it was leftover from a previous dinner so I just reheated it), piled the potatoes/shrimp on next, topped with fresh cucumber and tomato slices, and finally drizzled the sauce over.

The sauce was also leftover from a previous meal (see: Salmon w/ a Zucchini Yogurt Sauce).  It's basically a combination of 1:1 yogurt and mayo.  Then you throw in diced zucchini and chives, but really you can add whatever you like.  Or make your own yogurt sauce. 

So this dish is kind of like a salad, kind of like an mediterranean burrito bowl, but the combination of hot/cold, heavy/light makes for a tasty, hearty meal.

Saturday, March 10, 2012

Halal Style Chicken and Rice

As a new New Yorker, I was unaware of the phenomenon that was the halal cart on practically every street corner in Manhattan until moving here a few months ago.  So tonight's dinner is inspired by the chicken and rice you can buy off the street for $5 a pop, 24/7, with that oh-so-divine yet oh-so-mysterious "white sauce".

To construct my "knockoff chicken and rice" I created a lettuce base, topped with saffron infused rice mixed with cilantro, and finished with my chicken and veggies.  But let's not forget the white sauce garnish.  We had "dined" at one of the halal carts a few nights earlier, so we had leftover white sauce in a to-go container perfect for adding to our own meals throughout the week. 

For this version I used romaine lettuce.  (Here's an unnecessary picture of the pre-assembled lettuce on the plate.)
I prepared the yellow saffron rice according to package directions but added in about 1/4 cup chopped fresh cilantro toward the end of the cooking.

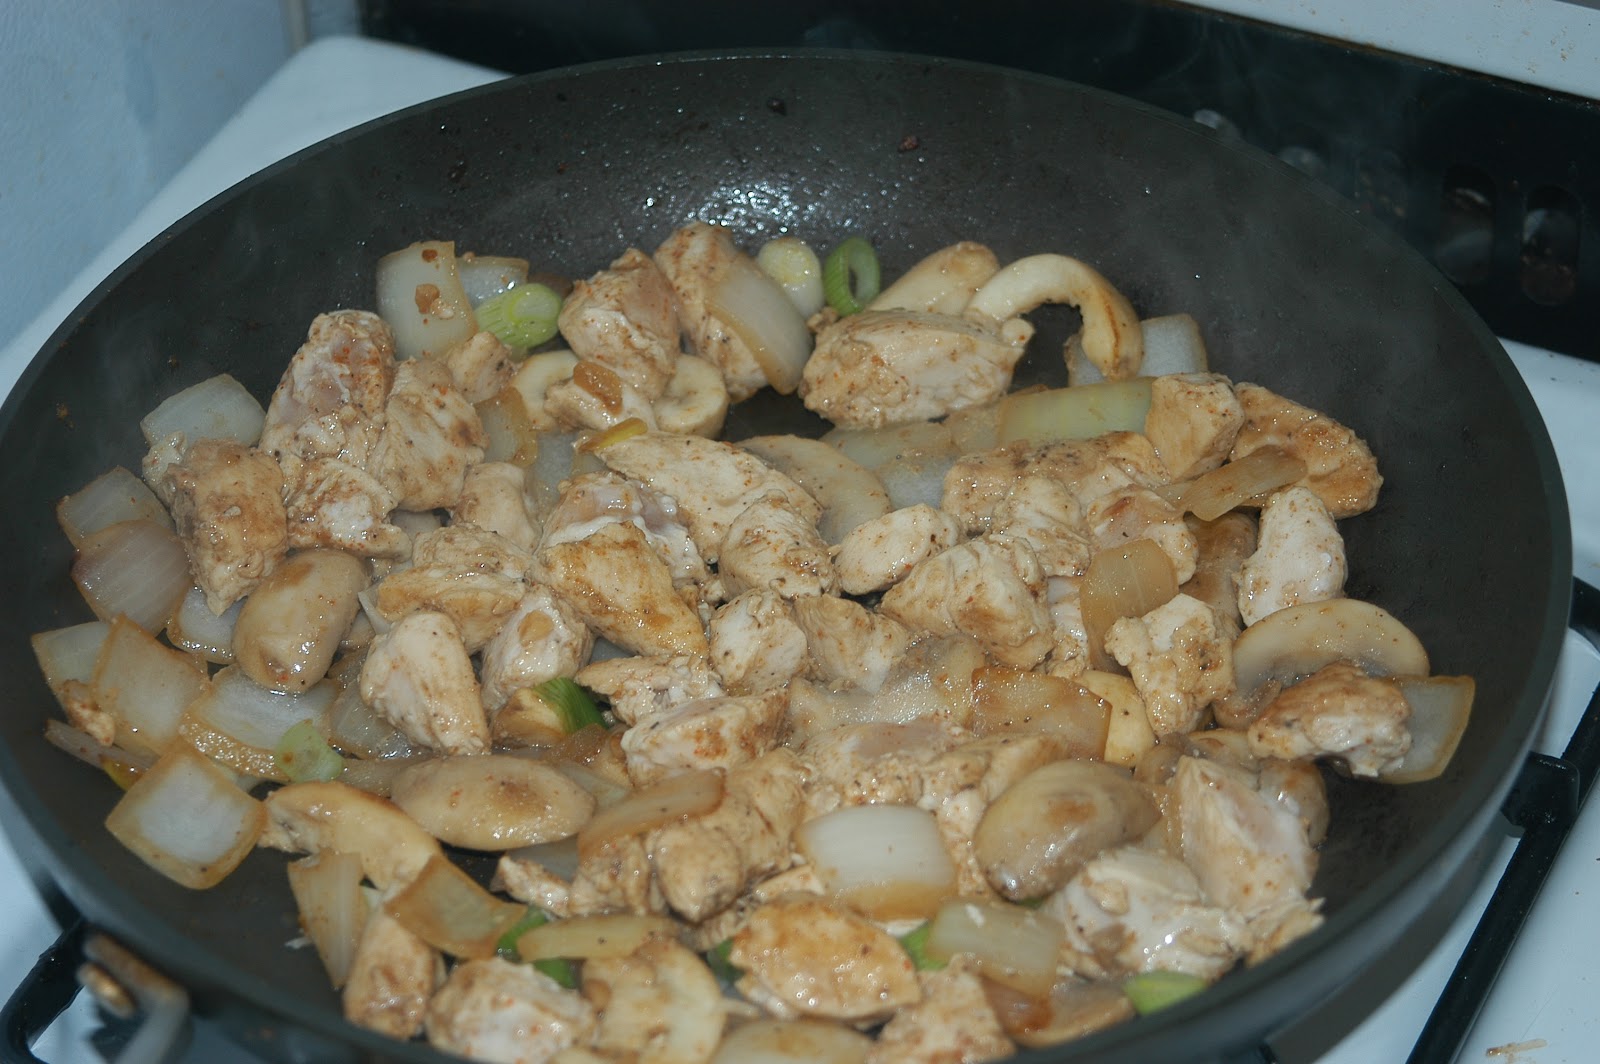
For the chicken, I chopped some yellow onion, mushrooms, scallions, garlic, and chicken breasts.  Add a little olive oil to a skillet, saute the onion, garlic, and mushrooms until softened.  Throw in your chicken.  Now at this point I added my spices: cumin, coriander, cayenne pepper, and ground black pepper. 
I went for cooking over a dry heat with dry spices to mimic the fresh-off-the grill aspect of the halal carts.  I threw the scallions in toward the end to cook a little.  But ultimately, the chicken and veggies were quite darkened and had a nice kick to them. 

I scooped my rice on top of the lovely bed of lettuce showcased above.  Then came the chicken/veggies.  And finally what street food meal is complete with the sauce?  A little googling yieldss mixed theories as to the contents of this sauce.  Some say mayo/vinegar.  Some say cucumber/yogurt.  Our version of the sauce had many black specks in it (and no cucumber to be found), and the taste was reminiscent of ranch dressing.  So use whatever sauces/dressings you like.  The lettuce lets you pretend you're having a salad, while the rice reminds you that you're having a heartier meal. 

Saturday, October 29, 2011

Pasta Primavera

As a child, nothing on the pasta menu sounded more gross than a bland pasta surrounded by veggies.  Hence, I don't think I've ever knowingly ordered pasta primavera.  But I guess when you're an adult you realize vegetables don't have to taste bad, so I decided to combine a smorgasbord of fresh ingredients to make a delightful pasta that the child version of me wouldn't hate either.

Ingredients: Garlic, Onion, Zucchini, Asparagus, Mushrooms, Corn, Spinach, Shrimp
Sauce: White Wine, Broth, Goat Cheese, Parmesan Cheese, 1tsp Flour

So i basically chopped all my veggies.  In a little bit of olive oil I sauteed the garlic and onion.  After 3-5 minutes I added the asparagus, zucchini, and mushrooms.  Once thoroughly cooked I moved the veggies to the side and added a little flour to create a roux.  I then added the white wine (I probably used about 1/2 cup).  To cut the strong flavor of a wine sauce I added some chicken broth to also reduce/thicken.

At this point I added the raw shrimp, corn, and spinach to cook through.  I added goat cheese to the sauce last, then threw on the cooked rigatoni.  I mixed everything well, poured in a bowl, garnished with parmesan and felt like a good kid for eating my veggies.  Since we know I love cream sauces, using cheese and wine/broth as a base rather than cream itself gave me the same thickening effect, but with a little less guilt.  Highly recommended.

Thursday, July 14, 2011

Cilantro Lime Soy Marinated Beef Strip Stir Fry over Couscous

I had some beef tips in the freezer that I bought for the sake of stir frying at some point.  Not feeling too inspired to do a typical teriyaki beef over white rice, I decided to change it up with some couscous and a marinade with a bit of a bite.  The couscous cooks in five minutes according to package directions, and the stir fry is very quick as well.  Here's what I used.

Marinade - Soy Sauce, Sesame Oil, Lime Juice, Fresh Cilantro
Veggies - Zucchini, Mushrooms, Onions, Garlic

The glamorous start to this meal is the act of marinating the meat in a plastic bag.  I used about 3 tbsp soy sauce, 1 tbsp sesame oil, 1 tbsp lime juice, 1/4 cup chopped fresh cilantro. 
While that sits we prepare the veggies.  I heated some olive oil and added the garlic and onions.  Now tell me, would this be a legit stir fry without a wok?  I think not.  
Rather than throwing all the veggies in at once, start with the ones that take the longest to cook/soften and work your way forward.  That means the zucchini was next up.  
Followed by mushrooms. 
And last, but not least, your meat. 
As it cooked I added more cilantro, soy sauce, and lime juice because I'm a huge sauce fan and I wanted some extra to pour over the couscous.  Notice I didn't add more sesame oil because it has a strong flavor and only a little was enough to achieve the effect I was going for.  Cook until your meat reaches your desired doneness, plate your couscous with stir fry on top, and drizzle the extra sauce over.  This was a good marinade and brought a little fusion cooking into my stir fry.

Tuesday, May 31, 2011

Filet Mignon with Bearnaise Sauce, Mashed Potatoes, and Bacon

This meal is not for the faint-of-gut vegetarian watching his cholesterol.  I'm almost embarrassed putting this online, but it was such a deliciously decadent dinner, and people pay a lot of money to clog their arteries at steakhouses, so here's how you can inch your way to heart disease from your own kitchen!

A good steak relies first on its cut, then on its preparation.  You can't go wrong with a filet (cut from the tenderloin of the cow), the most tender portion of meat on the cow.
Woo hoo! Meat Anatomy Lesson!
The tenderloin is typically the most expensive cut of meat from your butcher.  If you're making this for a special occasion, splurge.  Go to the butcher counter rather than the pre-packaged section.  But if you're like me and wanted to treat yourself one night because you walked 1.2 miles (it doesn't matter that you walked to the shopping mall, it still counts!), then look for the discounted meats sold at the end of the week that are close to "expiring" and marked down.  Throw it in the freezer, and you've got nothing to worry about. 

Step 1: Thaw the meat.  Since this is such a good cut of steak, don't defrost in the microwave and risk cooking it a little.  Defrost on the counter all day, or in the fridge overnight.  Trim away excess fat.

Step 2: Season.  Since this steak was served with a strong sauce, a little salt and pepper on each side was all I used.

Step 3: Cook.  I do not have the luxury of a grill, so I utilize pan-searing to cook my meats.  Get the pan nice and hot, a good medium-high setting on the stove will do.  You can lightly coat your pan with oil or butter to avoid sticking.  Throw on your steak.  Cook about 2-3 minutes per side to get a nice seared exterior.  At this point I transfer to the oven to heat through to my desired doneness (rare).  It's up to you whether you stay on the stove or move to the oven, or use a grill.  Just don't overcook your steak!

Step 4: Prepare your sides/sauces.  People often serve bacon wrapped tenderloins.  Rather than wrap mine with bacon, I cooked the bacon and served it on the side.  I made mashed potatoes ahead of time, but make the Bearnaise sauce right before serving.  I make the sauce from a packet.  It's delicious.  You need butter and milk.
Step 5: Plate, add your desired amount of sauce, eat, enjoy the resulting food coma.

Wednesday, October 27, 2010

Salmon and Chive Mashed Potatoes with a Goat Cheese Pancetta Cream Sauce

Determined to get out of my frozen and snack food rut, I decided to class up dinner with some salmon I found on sale at Safeway yesterday.  I created the sauce based on what I knew was in the fridge, and in retrospect most people might prefer this on a chicken or maybe a steak, but since I love rich cream sauces on everything, I thought it was delicious on my salmon.  So here's what you need:

Sauce Ingredients: Pancetta, Garlic, Onion, Mushrooms, Goat Cheese, Flour, Cream
Other Ingredients: Salmon, Chicken Broth, Potatoes, Milk, Butter, Chives


I began with boiling the sliced potatoes and poaching the salmon in chicken broth over medium heat until cooked to a nice medium well.  You can cook the salmon however you prefer, but I'm a fan of poaching because it yields the moistest result.  
Then I mashed my potatoes with butter, milk, and chives and plated them with the salmon on top while I made the sauce (I did the sauce after the salmon because I used the same saute pan, but if you aren't frugal with your saucepans feel free to make the sauce concurrently with the poaching of the fish).


I started by sauteing the pancetta with garlic over medium heat and added chopped onion and sliced mushrooms.  There wasn't enough fat from the pancetta so I added a little butter to help with the cooking process.
When everything was cooked to the desired doneness, I added a little flour to the pan to make a roux.  Next I added some cream and it thickened as I stirred (about 1/4 cup at this point).  I added the goat cheese last (maybe about 1 ounce) and added a little more cream to create more sauce.  I poured it over the salmon and potatoes and voila!  When you're working with roux and cream sauce, you want to make sure to prepare it as close to when you're serving the food as possible because it could thicken too much or if it sits too long it could separate and all these things make for grossness.

Tuesday, September 21, 2010

Homemade Pizza

Last week the roomslice was craving pizza and while we were debating which Mission pizzeria would provide the shortest wait for a Friday night dinner, we came to the conclusion that we should just make our own.  I've made the dough from scratch before, but this time we opted for the Trader Joe's uncooked packaged variety.
mmm dough. sitting for twenty minutes.


We portioned the dough into quarters to make two pizzas each.  One for dinner and one for lunch at work this week.  Now this is where the fun part starts because you can basically just throw on whatever you've got in the fridge.  I opted to first knead some chopped garlic in my dough for a kick of flavor.  Roommate went for a tomato sauce and I used a hummus guacamole for my base.  If I had had any, I likely would've opted for pesto instead, but we made do with what we had.
Roommate's more traditional pizza on the left.  My noncomformist pizza on the right. 
Toppings: I decided on shrimp, bacon, mushrooms, red onions, tomatoes, feta cheese, cheddar cheese, parmesan cheese.  I was debating adding a fried egg on top at the end, but decided there was already enough going on on my pie.  Tip: I cooked the bacon and the shrimp about three-quarters done before putting them on the pizza so that they wouldn't be raw going into the oven, but wouldn't become overcooked.  This was good because it meant I didn't end up with a pizza dripping with bacon grease, (though we all know I probably wouldn't have minded).

We cooked the pizzas on one of those no-stick cookie mats which still produced a good crust, but no sticking.  Perfect.  About ten minutes at 450 degrees and we were enjoying our home-made pies without the wait or the bill that comes with a restaurant. 

Friday, September 10, 2010

Salmon with a Zucchini Yogurt Sauce

Served with mashed potatoes and asparagus, both of which also taste good with the yogurt sauce
This has been a favorite recipe of mine for years, though I forget where we first discovered it.  I like it because it's pretty quick and easy with few ingredients but it tastes way more involved.

Ingredients for the sauce: plain yogurt, mayo, zucchini, chives
Ingredients for the fish: salmon fillets, poaching liquid (I usually like white wine and water with tarragon, but this time we used chicken broth and it still tasted great)

Poached fish results in way more tender and juicy fillets than most other methods of cooking.  However, it is still possible to overpoach a fish.  I like to put the salmon in a saute pan that covers about 3/4 - 4/5 of the salmon with the poaching liquid on medium to medium-high heat (you want it to be just under a boil).  Once it appears that most of the fish is cooked slightly, aside from a small portion of the top part (maybe about 5-7 minutes) flip the fillets over.  Cook for the same amount of time on the other side and you're done.

For the sauce, mix equal parts plain yogurt and mayonnaise (we did 8 ounces each and had lots of leftovers).  Then take one small zucchini and dice it and a small handful of chives and dice them.  Add as much of the zucchini and chives as you'd like to the yogurt/mayo (we went for a whole zucchini and maybe 1/4 cup of chives).

And that's it.  Plate the salmon, spoon some sauce over, and make sure to leave the bowl of sauce on the table with dinner, because your guests will definitely be going for more.  (Zucchini garnish optional)

Tuesday, August 31, 2010

Sliders!

Bacon Teriyaki, Bernaise Balsamic, Bacon and Blue
I'm just a little bit excited about last night's dinner.  Craving a burger on the way home from work I realized, "I've got some ground beef in the freezer, I'll make my own!" and thus...sliders!  And here's the fun part about sliders, you can make a few with different flavors so you don't have to choose just one type of cheese, or one type of marinade for the beef (Yes, I do in fact marinade my beef).  So here's the lowdown:

For the burger patties: Ground beef (I used 80/20), diced mushrooms, diced garlic, marinade (add diced onions if you have any...I didn't)
My two marinades: Balsamic vinegar or Teriyaki/soy sauce/sesame oil/sesame seeds
Cheeses: Roquefort, Parmesan, Cheddar, Feta (not pictured)
Toppings: Bacon, Scallions
Sauces: Mayo, Bernaise
Bread: Tuscan Pane (from Trader Joe's) lightly toasted

I enjoy marinading my ground beef to add flavor in the burger when you bit into it.  I opted for two marinades last night: a balsamic and a teriyaki.  I also enjoy throwing diced mushrooms and/or onions in with my ground beef to cook within the burger itself.  Another dimension of added flavor and texture.
Ground beef, garlic, mushrooms, balsamic.  Don't be afraid to get your hands messy when you mix it all together.  
Once your beef is mixed to your liking, form small patties with your hands.  If you have trouble with the meat falling apart you can add some egg and milk, but your burgers will taste a bit like meatloaf, if you're cool with that.  Not wanting to use my grill pan, I again opted for the skillet cooked burgers.
It's important not to squish your burgers down as they cook, no matter what surface you're cooking them on, because that's how they lose all their good juices from the inside and you're left with a dry, unappealing burger.  You can squish once they're in the bun.  So cook these, turning over periodically until they're cooked through to your liking.  When almost done, you can add the cheese on top to melt before assembling your burgers.  I also like using bread instead of hamburger buns because I don't have to buy something special for these, and I actually love the taste/toasty texture.

So what were my final creations?  At the bottom of the first picture is your classic "bacon and blue" with the Roquefort cheese, bacon, scallion, and mayo.  This used the balsamic burger.  Going up clockwise we have a traditional bacon burger with cheddar cheese and mayo.  This utilized the teriyaki burger.  And my favorite of the night was the balsamic burger topped with parmesan, scallions, and bernaise sauce (bringing the steakhouse to the burger joint).  I had a ton of leftovers, so I must admit I nibbled later on a balsamic burger topped with feta, scallions, bacon, and bernaise sauce sans bread. 

Proof that you don't need a grill and don't need to settle on a single burger for dinner.

Wednesday, August 25, 2010

Pasta with Bacon in a Feta Cream Sauce

We have a lot of feta cheese leftover from a dinner party last weekend, so I decided to try for a feta cream sauce for my pasta and this is what I came up with.  I adore cream sauces for pasta and the roux (flour + butter, or in this case bacon grease) is what ensured proper thickening of the sauce while the cheeses took care of the flavor.  

Ingredients from my fridge: Bacon, Garlic, Scallions, Mushrooms, Cream, Milk, Feta Cheese, Gruyere Cheese (substitute any ingredient with your fav veggies, meats, or cheeses instead)
Ingredients from my pantry: Farfale pasta, All purpose flour, pepper

Cook 3 slices of chopped bacon with a little garlic, mushrooms, and chopped scallions until cooked through.  Moving the bacon et al. to the side of the saute pan I added flour to the bacon grease to create a roux (about 2 tbsp worth of flour).  Then I added cream and milk to the mixture (about 1-1.5 cups total volume between the two) and stirred constantly as it thickened.  Lowering the heat I added the feta (about 3/4 cup worth) and mixed it in completely.  I also topped off with some freshly grated gruyere.  Add the freshly cooked pasta, some cracked pepper, and voila! Last Night's Dinner!