I attended a potluck last weekend and decided to try a new recipe to take as my contribution. My friend was making jambalaya, so I opted to try my hand at corn fritters. I found a recipe, which I immediately strayed from, and this is what I came up with.
Ingredients: 1 box Jiffy Corn Muffin Mix, 1 egg, 1/2 cup sour cream, 1/3 cup milk, 3/4 cup corn kernels
Fried in Vegetable oil
So the recipe I found called for stone ground corn meal, but I've been a user of Jiffy corn muffin mix my whole life, and I couldn't find stone ground corn meal at the grocery store. To the box of corn muffin mix I added the egg, milk, and sour cream and mixed well.
I then added the corn kernels, thawed from the freezer bag they were in, and let sit in the mix for at least 15 minutes before frying.
At this point I filled a skilled with vegetable oil, about 1/2 to 3/4 inch deep. I heated the oil on medium heat, and by the time my batter sat for about fifteen minutes, the oil was hot enough to sizzle when I added a dollop of batter. Now frying is tricky because oil that is too hot will burn your fritters, but oil that is too cold won't cook them through and they'll fall apart when they hit the oil. So heat the oil on medium and adjust when you start adding the fritters, hotter or cooler depending on how fast they are browning.
Using an ice cream scoop, melon baller, cookie dropper, or spoon, drop balls of the cornmeal mix into the hot oil. Let fry about a minute and a half on one side, then turn over and go for a minute and a half on the other.
You'll notice the golden brown indicates it is cooked on the outside, but to ensure a fully cooked interior, you can cook for another 1 to 3 minutes turning over every so often. But really the best way to test how long you need to fry them is to to cut one open and try it for yourself.
Once properly fried, place on a wire rack over a cookie sheet to drain the oil and later on paper towels to sop up any extra oil. You can eat these on their own, or serve with a salsa or sauce of your choosing.
Chronicling my daily meals to showcase recipes, techniques, and restaurant fares. This is a blog to explore my love of all things edible and the processes behind them.
Sunday, March 20, 2011
Saturday, March 12, 2011
Cornish Game Hens with White Rice and Bacon
This recipe has been a mainstay for family dinners for as long as I can remember. The best part about this is the rice. It's buttery on the bottom of the baking dish, but the rice on the top gets crunchy and it's pretty fabulous. My mother hates to cook, but she makes good food, and this recipe is one she's perfected. A quick phone call the other day to ask for proportions and tips, and we were ready for our feast.
Ingredients: cornish game hens, white rice, butter, onions, salt/pepper, bacon
Preheat oven to 350 degrees.
This is a pretty simple dish, and you can obviously spice it up if you want other flavors, but we were going for simplicity. So first, prepare the rice according to package directions. I used long grain white rice, but you can use any rice you prefer. I made 1 1/2 cups of rice which yielded 3 cups since my baking dish couldn't hold too much more than that. For the last 5 minutes of cooking i added diced onions and a tablespoon of butter to the rice.
When the rice is ready, spread about 1/3 of it on a baking dish. Stuff the birds with some rice and place them on top of the rice in the baking dish. Fill the rest of the rice in the open areas of the baking dish.
Now, butter these guys up. Rub the birds with butter and place little cubes on/in the rice. I used about 2 tbsp total for this part, but in retrospect I could have used more. The final, though maybe unnecessary touch, is to drape a slice of bacon across the breast of each hen. As we know, everything tastes better with bacon, and this adds a nice extra flavor. But you certainly can roast these hens without it.
Finally, season with salt and pepper, put in the oven, and bake for about an hour to an hour and a half. I went for the longest time, just to make sure everything was cooked through, and the butter helped keep things moist. To serve we typically cut the hens in half with kitchen shears and pile on the rice.
Ingredients: cornish game hens, white rice, butter, onions, salt/pepper, bacon
Preheat oven to 350 degrees.
This is a pretty simple dish, and you can obviously spice it up if you want other flavors, but we were going for simplicity. So first, prepare the rice according to package directions. I used long grain white rice, but you can use any rice you prefer. I made 1 1/2 cups of rice which yielded 3 cups since my baking dish couldn't hold too much more than that. For the last 5 minutes of cooking i added diced onions and a tablespoon of butter to the rice.
When the rice is ready, spread about 1/3 of it on a baking dish. Stuff the birds with some rice and place them on top of the rice in the baking dish. Fill the rest of the rice in the open areas of the baking dish.
Now, butter these guys up. Rub the birds with butter and place little cubes on/in the rice. I used about 2 tbsp total for this part, but in retrospect I could have used more. The final, though maybe unnecessary touch, is to drape a slice of bacon across the breast of each hen. As we know, everything tastes better with bacon, and this adds a nice extra flavor. But you certainly can roast these hens without it.
Finally, season with salt and pepper, put in the oven, and bake for about an hour to an hour and a half. I went for the longest time, just to make sure everything was cooked through, and the butter helped keep things moist. To serve we typically cut the hens in half with kitchen shears and pile on the rice.
Thursday, February 17, 2011
Butternut Squash Soup
| It should come as a surprise to no one that my garnish of choice was bacon. |
Ingredients: 1 large butternut squash, 1/4 cup chopped onion, 1 tbsp minced garlic, 1 14 oz can chicken broth, water, curry seasonings, salt/pepper, 1/4 cup milk/cream, bacon for garnish
Start by sauteing the onions and garlic in either butter, oil, or bacon grease. Once softened, add your squash and seasonings. I found the curry powder to be a nice compliment, but sage or thyme could be nice too.
I wanted to saute the squash just a little bit without liquids, which may or may not have added any depth of flavor, but I went with it. I added the can of chicken broth, then a canful of water. I wanted to barely cover the squash, and as it cooked and the liquid reduced, I'd add a little more water. Let cook for about 30 minutes.
Once you can smash the squash with a fork or spoon, it's time to blend. Bust out those immersion blenders, otherwise transfer to a regular blender and blend until smooth. I then added a little milk here, because I was out of cream, and some more pepper and a little salt. Season to your liking. I poured the soup, garnished with bacon, and enjoyed.
Tuesday, February 15, 2011
Shepherd's Pie
Last night was a meat and potatoes sort of night, so I felt like attempting a recipe I'd never made before: shepherd's pie. Now as is the story of my life, I didn't have as many ingredients as I would've liked, but I was not about to head out to the grocery store, so I made do, and I was actually pretty pleased with the results.
Ingredients: 1.25 lb ground beef, 3 carrots peeled and sliced, 1 small leek sliced, 1/4 onion chopped, 2 cloves garlic diced, 1 tbsp chopped fresh oregano, olive oil, salt/pepper/coriander/cumin, 1/4 cup broth or white wine, mashed potatoes
Preheat oven to 350 degrees. Prepare your mashed potatoes. I used 3 russet potatoes, mashed them with milk, butter, salt/pepper, and 1/4 cup parmesan cheese.
Begin the filling by sauting your vegetables in a little olive oil with some salt and pepper. Throw in whatever veggies you have, I would have added mushrooms had they been in my fridge. After about 7 minutes of softening, add the ground beef.
Cook over medium heat until browned. Mix in a dash of spices like cumin and coriander and add your fresh herbs. If you want to be healthier, drain the fat at this point. If you don't care add the broth or wine now. At this point I would have liked to add some tomato paste or sauce, but alas I had none of that either.
Fill a baking dish with your meat and veggies, spread mashed potatoes on top and bake in the oven for about 20 to 30 minutes. Finish with about 5 minutes under the broiler to get that characteristic golden brown topping.
The baking allows the carrots to soften, but since everything is already cooked through you can bake as long or as short as you'd like.
Ingredients: 1.25 lb ground beef, 3 carrots peeled and sliced, 1 small leek sliced, 1/4 onion chopped, 2 cloves garlic diced, 1 tbsp chopped fresh oregano, olive oil, salt/pepper/coriander/cumin, 1/4 cup broth or white wine, mashed potatoes
Preheat oven to 350 degrees. Prepare your mashed potatoes. I used 3 russet potatoes, mashed them with milk, butter, salt/pepper, and 1/4 cup parmesan cheese.
Begin the filling by sauting your vegetables in a little olive oil with some salt and pepper. Throw in whatever veggies you have, I would have added mushrooms had they been in my fridge. After about 7 minutes of softening, add the ground beef.
Cook over medium heat until browned. Mix in a dash of spices like cumin and coriander and add your fresh herbs. If you want to be healthier, drain the fat at this point. If you don't care add the broth or wine now. At this point I would have liked to add some tomato paste or sauce, but alas I had none of that either.
Fill a baking dish with your meat and veggies, spread mashed potatoes on top and bake in the oven for about 20 to 30 minutes. Finish with about 5 minutes under the broiler to get that characteristic golden brown topping.
The baking allows the carrots to soften, but since everything is already cooked through you can bake as long or as short as you'd like.
Tuesday, February 8, 2011
Salmon with Spinach and Bacon Quinoa
Last night was one of those nights I was convinced I had no food for dinner, until I looked in my freezer and put together this little ensemble. Half a bag of frozen spinach and some salmon inspired this dish. I realized I had been neglecting the quinoa in my pantry, so rather than rice or potatoes, that was my side. But since quinoa is incredibly bland when cooked solo, I made sure to spice it up the best way I know how...with bacon. I'm typically a fan of poaching salmon, to ensure moistness, but last night I decided to go wild and bake the salmon. The result? Still juicy and delicious. Phew.
For baking the salmon: salt, pepper, coriander, cumin, olive oil
For the quinoa: 1 cup red quinoa and 2 cups water, 1/2 bag frozen spinach, 1/4 cup chopped onion, 1 tbsp garlic, 3 slices bacon, 1/4 cup grated parmesan cheese, fresh chopped cilantro, lime/lemon juice ~ 2 tbsp
Preheat oven to 375. Cook the quinoa according to package directions. I often like to cook in broth rather than water, but last night I stuck with water since I was adding so many other flavors later.
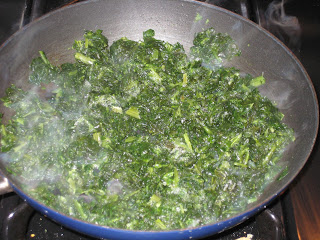
Fresh spinach would obviously be preferable, but if you're using frozen like I was, wilt/thaw it in a saute pan over medium heat with a little water until heated completely. Set aside in a small mixing bowl and when cooled, drain any excess water.
You can take this time to prepare the salmon for the oven. Line a baking sheet with foil for easier cleanup. I then sliced the fish into the serving pieces, coated with salt/pepper and a light sprinkling of the cumin and coriander (use whatever spices you like/have) and drizzled with olive oil. Put in the oven and cook until your desired doneness. Mine finished exactly as I finished the quinoa/everything else, probably about 15 minutes.
Lastly, chop the bacon and heat in the saute pan you used for the spinach. Once rendered (cooked to a light crisp), remove bacon to paper towels to drain and add garlic and onion to the bacon grease in the skillet. About this time my quinoa had absorbed all the water so I threw that in the bowl that was holding the spinach. When the onions/garlic were sauted nicely, I threw them in the quinoa bowl, with the remaining bacon grease, since I love the flavor and it was only about a tbsp. Add the parmesan cheese, chopped cilantro, and citrus juices. Mix it all up so the flavors meld and then add the cooked bacon. Plate some quinoa, throw a slice of salmon on top, and enjoy! You could even mix the salmon in with the quinoa for more of a salmon salad sort of feel, but this way you can take some bites of just salmon, just quinoa, or a bit of both.
Friday, February 4, 2011
Chicken Wellington
I invented this recipe a little over two years ago when I had leftover puff pastry in my freezer and wanted to make a spin on a chicken pot pie. I may have also been inspired by Costco's Chicken Bake, but it's hard to know for sure. I even created a legit recipe with amounts and instructions (as opposed to my usual "a bit of this" "as much as you want of that").
1.25 lbs Chicken Breast Tenders
1 14 oz can Chicken Broth
½ cup dry white wine
3 cups water
3 slices uncooked bacon, chopped
½ small brown onion, finely chopped
1 tbsp garlic, minced
½ zucchini, finely chopped
1 cup finely chopped mushrooms
3 oz cream cheese
1 scallion, thinly sliced
1 package Pepperidge Farm Puff Pastry Sheets
1 egg
1 tbsp water
1. Preheat oven to 375 degrees Fahrenheit.
2. Heat chicken broth, white wine, and 3 cups water in a medium saucepan. Add chicken breasts to pan and poach until cooked through then chop into 1 inch pieces. (Careful, it will be hot). Set aside in medium-sized mixing bowl.
3. Heat medium-sized skillet over medium heat and add sliced bacon. Once cooked, remove bacon with a slotted spoon and place on paper towels to drain.
4. Add onion and garlic to bacon grease remaining in pan. Cook until soft, about 5 minutes, then add zucchini and mushrooms. Saute another 10 minutes until tender.
5. Remove vegetables from heat and add to the chicken in the mixing bowl. Mix in cream cheese and once everything is evenly covered, stir in scallions and bacon.
6. Place Puff Pastry dough sheet on a nonstick cookie sheet. Spoon chicken, vegetable, and cream cheese mixture into center of the dough sheet, leaving about 3 inches of uncovered dough on the sides and 1.5 inches of uncovered dough on the ends. Cut ¾ inch strips in the exposed dough sheet sides at 45 degree downward angles. Fold the strips of dough sheet onto the chicken filling in a crisscross pattern and pinch up the 1.5 inches of dough at the ends, underneath the strips.
7. Prepare an egg wash with the egg and 1 tbsp water. Brush egg wash over the prepared chicken-filled dough sheet.
8. Bake in the preheated 375 degree oven for 15-18 minutes, until dough becomes golden brown. Remove from oven, slice, and serve!
Tags:
bacon,
chicken,
cream cheese,
garlic,
mushrooms,
onion,
puff pastry,
scallions,
zucchini
Wednesday, January 26, 2011
Bibimbap, a Variation
I was inspired by Bibimbap the other night, but lacking the traditional ingredients, so I made this, my variation on the Korean dish. I didn't have any beef, so I opted for chicken, and used the veggies I had in my fridge.
Ingredients: Rice, Chicken, Asparagus, Mushrooms, 1 Leek, Garlic
Sauce: Soy sauce, sesame oil, chili powder, salt/pepper
Chop your veggies and chicken and place the chicken in soy sauce and garlic to marinate for anywhere from thirty minutes to a few hours. Add chili oil/any other relevant spices or sauces you may have.
Prepare the rice. I used white jasmine rice. While the rice is cooking, heat some sesame oil in a skillet and add your veggies.
Once they are well sauteed, add the chicken and it's sauce to the skillet. Cook through and add more soy sauce/seasonings as you see fit. When everything is cooked completely, put some rice in a bowl, add the chicken/veggies on top. Finally crack an egg in the skillet you cooked the veggies in to fry it to your desired doneness. Put the egg on top of the rice/veggie mixture. To eat, mix everything together in classic bibimbap fashion or eat in portions, whatever you'd prefer.
Ingredients: Rice, Chicken, Asparagus, Mushrooms, 1 Leek, Garlic
Sauce: Soy sauce, sesame oil, chili powder, salt/pepper
Chop your veggies and chicken and place the chicken in soy sauce and garlic to marinate for anywhere from thirty minutes to a few hours. Add chili oil/any other relevant spices or sauces you may have.
Prepare the rice. I used white jasmine rice. While the rice is cooking, heat some sesame oil in a skillet and add your veggies.
Once they are well sauteed, add the chicken and it's sauce to the skillet. Cook through and add more soy sauce/seasonings as you see fit. When everything is cooked completely, put some rice in a bowl, add the chicken/veggies on top. Finally crack an egg in the skillet you cooked the veggies in to fry it to your desired doneness. Put the egg on top of the rice/veggie mixture. To eat, mix everything together in classic bibimbap fashion or eat in portions, whatever you'd prefer.
Saturday, January 22, 2011
Stuffed Pork Chops
I've become quite a fan of stuffing pork chops because I find it helps keep them tender thanks to the slight moisture from the stuffing. I first started stuffing pork chops when I had leftover stuffing from thanksgiving, but you don't have to stuff them with just bread. Some people like apples with their porkchops, or you could do all veggies, or maybe even rice if you wanted something else starchy. But here's what I did this time around.
Stuffing: toasted bread cubes, leeks, mushrooms, garlic, chicken broth, oil/butter
Sauce (optional): white wine, butter, flour
Preheat your oven to 375.
I didn't have any leftover stuffing this time, so I made my own. I took two slices of sourdough and two slices of wheat bread, chopped them into cubes, put them on a cookie sheet, drizzled with a tiny bit of olive oil, and baked for about 12 minutes.
Meanwhile, in a saute pan, I added the chopped leeks, mushrooms, and garlic to a little oil or butter. Once softened, add the toasted bread and cook for about a minute or two. Then add the chicken broth. I eyeball it. Starting with a small amount, maybe 1/4 of a cup for this quantity of bread. You want the bread to absorb the liquid, but you don't want extra sauce sitting in the pan, and you don't want your bread to be too soggy. It should look like this:
Stuffing: toasted bread cubes, leeks, mushrooms, garlic, chicken broth, oil/butter
Sauce (optional): white wine, butter, flour
Preheat your oven to 375.
I didn't have any leftover stuffing this time, so I made my own. I took two slices of sourdough and two slices of wheat bread, chopped them into cubes, put them on a cookie sheet, drizzled with a tiny bit of olive oil, and baked for about 12 minutes.
Meanwhile, in a saute pan, I added the chopped leeks, mushrooms, and garlic to a little oil or butter. Once softened, add the toasted bread and cook for about a minute or two. Then add the chicken broth. I eyeball it. Starting with a small amount, maybe 1/4 of a cup for this quantity of bread. You want the bread to absorb the liquid, but you don't want extra sauce sitting in the pan, and you don't want your bread to be too soggy. It should look like this:
To prep the pork chops, you'll want to butterfly them. Basically use a paring knife to cut directly in the center of the chop and make a little pocket for the stuffing. Once butterflied, stuff the chops, and you may want to use a skewer or toothpick to help keep the stuffing in place while they cook. If you have a skillet that can be used on the stove and in the oven, cook your chops in that, otherwise you'll have to transfer them to an oven proof roasting pan. In said skillet with a little butter or olive oil, sear the outside of the chops.
After about 5 minutes (depending on the thickness of your chops) turn them over and sear the other side. After another 5 minutes transfer to the oven to cook through. This will probably take about ten to fifteen minutes or so. You don't want to overcook and dry out the chops, but you don't want the inside to be pink. Though, trichinosis is actually destroyed at 145 degrees F, which corresponds to a medium rare pork chop. Most people are afraid to eat a pink chop, but just know if your temp is hot enough, you don't have to worry about disease.
When done, plate the chops and add a little more stuffing on top if you'd like (I served with mashed potatoes, big surprise there), and I made a quick sauce to pour over. Deglaze your skillet with some white wine to soak up all those great pan drippings. As the sauce cooks and thickens, you can add a tiny bit of flour if you want it to be thick and creamy, otherwise you can add a little bit of butter to have a similar, but less thickening effect. Spoon over the chops, and enjoy!
Thursday, January 20, 2011
Yellow Split Pea and Pumpkin Soup
My apologies for the blogging hiatus. We've got quite a bit of backlog here at LND, so in no particular order here we go!
Soup. Perfect for the winter. I've had the last of a bag of yellow split peas for the past 2 years, and wanted to finally get rid of them, so I opted to make this soup I made with the split peas 2 years ago. This is also great if you've got a leftover can of pumpkin in your pantry from the holidays that never quite turned into a pie.
The most time consuming part of this soup is soaking the peas in broth. I used vegetable, but in the past I've used chicken broth. I emptied 2 cans of broth into a pot, and added about 3/4 cup of split peas.
Also in the past, I've chopped 1/4 of a large onion and put it in the broth with the peas, but I sadly had no onion this time. After about an hour and a half the peas will look like above...still a little crunchy but much softer than before. At this point I added the can of pumpkin, some pepper, and thyme and cooked for another 45 minutes.Next I spiced it up. I added some powdered saffron, but you should throw in whatever you have/like. No need to blend this soup since the ingredients are so mushy. I added about 1/8 cup of cream because that's what I do, but it would taste just fine without the cream. I feel like this would also work with squash and/or green split peas. And if you wanted to throw some carrots in maybe? Go wild with your winter soups!
Sunday, January 9, 2011
Oysters and Pearls
| Not as pretty as when they serve it at the French Laundry, but I was going for taste and maximal oysters per ramekin. |
I won't go through all the details of the recipe, since you can follow along online, but I'll share my pictures and experiences.
First let the tapioca soak in the milk for an hour. Unfortunately, we were unable to find small pearl tapioca at any of our grocers, so we settled for instant. I fear this may have altered the flavors/textures in some way, so again, next time we'll get the real deal. But this is what it looked like after an hour of soaking; pretty much all the liquid was absorbed.
While the tapioca is soaking, take care of the oysters. We opted to buy jars of fresh Eastern oysters, but next time I plan to splurge, bust out the shucking knife, and get fresh oysters still in the shell (our local grocer did not carry oysters and would have required a special order a few days in advance, hence the jars). To get beautiful oysters, the recipe calls for trimming away the edges. I used small kitchen scissors, saved the trimmings in a small saucepan, saved the juice, and the shapely oysters in separate bowls. Typically the FL serves two oysters per dish. I went for six.
Whip the cream. Store it in the fridge. We went for hand whipping. It took about ten minutes.
Cook the oyster trimmings with milk and cream. Simmer so the flavor of the oysters infuse into the milk.
Take the tapioca that was soaking, strain it and run water over it to get all the milk off. Then cook it in the milk/cream that was steeping with the oysters. It'll thicken.
Prepare the sabayon. This is one part you'll need to constantly monitor. It takes about 3 to 5 minutes. Whisk the egg yolks and oyster juice in a double boiler (a bowl placed over a pot of simmering or boiling water). Constantly whisking, it will eventually thicken and you'll know when it's a different consistency, like the whipped cream.
Here comes the mixing/folding. Tapioca, sabayon, creme fraiche, pepper, whipped cream. When properly combined, pour into the ramekins or whatever dishes you'll be using, cover, and place in the fridge until ready for use.
Finally, prepare the sauce. Vermouth, oyster juice, shallots, vinegar. When the liquid is absorbed (as seen above), you can start whisking in the butter. The FL cookbook has a page long description about this butter mixture. It's really interesting, but I wont bore you with the details. Basically they have this part butter liquid that if kept at the right temperature can keep food hot without continuing to cook it. And it won't leave the meat/fish/whatever tasting like butter, but it will keep the juices in because of the fats in the butter. It's a way they keep foods warm at the FL if they're not quite ready to be served, but they're done cooking.
Once the butter is added, you can cook the tapioca in the oven for five minutes. Once out, add the oysters and chives to the butter to just slightly heat through (don't overcook. i found that round two of the oysters yielded slightly shriveled and drier oysters).
No need to cook these ramekins in a water bath. Once out of the oven, place oysters on top. Spoon the buttery sauce over, and add a dallop of caviar. Serve immediately.
So they were good, but nowhere near as phenomenal as at the restaurant. Next time (yes, even after an afternoon of cooking, and a kitchen full of dirty pots, there will be a next time) I will use fresher oysters, small pearl tapioca, and use smaller ramekins/dish less tapioca into them. The sauce was delicious, and I found that when I added more it really made the difference. Having nice quality caviar was also a huge flavor bonus. I highly recommend it.
Tags:
appetizers,
caviar,
cream,
milk,
oysters,
restaurants,
shallot,
tapioca,
vermouth
Subscribe to:
Posts (Atom)