Showing posts with label lettuce. Show all posts

Monday, May 28, 2012

Potatoes, Shrimp, and Veggies over Rice and Lettuce

This was an interesting dinner I made about a month ago.  For some reason I was craving potatoes (well, aren't I always?), but also kind of wanted something fresh and salad-like.  So I figured I'd assemble pretty much everything fresh in my fridge on top of lettuce, but added some rice for texture and substance.  It was pretty good.

Ingredients: Romaine lettuce, tomato, cucumber, potatoes, basmati rice, shrimp, red onion, garlic, tarragon, cumin, coriander, salt/pepper, yogurt sauce to garnish

Start by peeling and chopping your potatoes.  I chopped into ~1 inch cubes, but do whatever you prefer.  Then, just as if I was preparing breakfast potatoes I cooked them in the skillet with a little bit of olive oil and added the tarragon, salt/pepper, cumin, and coriander.  Let them cook for about 20 minutes to cook through, and if you want you can periodically add a little broth that will be absorbed and soften the insides. 
Once primarily cooked, I added the red onion, a little garlic, and the shrimp to the pan.  Saute until the shrimp are pink and the onion softened.  I opted to chop my shrimp for the sake of having more shrimp scattered throughout in smaller bites.  It makes the shrimp go further.
Once cooked through you can assemble your meal.  I layered lettuce on the plate first, covered with the rice (it was leftover from a previous dinner so I just reheated it), piled the potatoes/shrimp on next, topped with fresh cucumber and tomato slices, and finally drizzled the sauce over.

The sauce was also leftover from a previous meal (see: Salmon w/ a Zucchini Yogurt Sauce).  It's basically a combination of 1:1 yogurt and mayo.  Then you throw in diced zucchini and chives, but really you can add whatever you like.  Or make your own yogurt sauce. 

So this dish is kind of like a salad, kind of like an mediterranean burrito bowl, but the combination of hot/cold, heavy/light makes for a tasty, hearty meal.

Saturday, March 10, 2012

Halal Style Chicken and Rice

As a new New Yorker, I was unaware of the phenomenon that was the halal cart on practically every street corner in Manhattan until moving here a few months ago.  So tonight's dinner is inspired by the chicken and rice you can buy off the street for $5 a pop, 24/7, with that oh-so-divine yet oh-so-mysterious "white sauce".

To construct my "knockoff chicken and rice" I created a lettuce base, topped with saffron infused rice mixed with cilantro, and finished with my chicken and veggies.  But let's not forget the white sauce garnish.  We had "dined" at one of the halal carts a few nights earlier, so we had leftover white sauce in a to-go container perfect for adding to our own meals throughout the week. 

For this version I used romaine lettuce.  (Here's an unnecessary picture of the pre-assembled lettuce on the plate.)
I prepared the yellow saffron rice according to package directions but added in about 1/4 cup chopped fresh cilantro toward the end of the cooking.

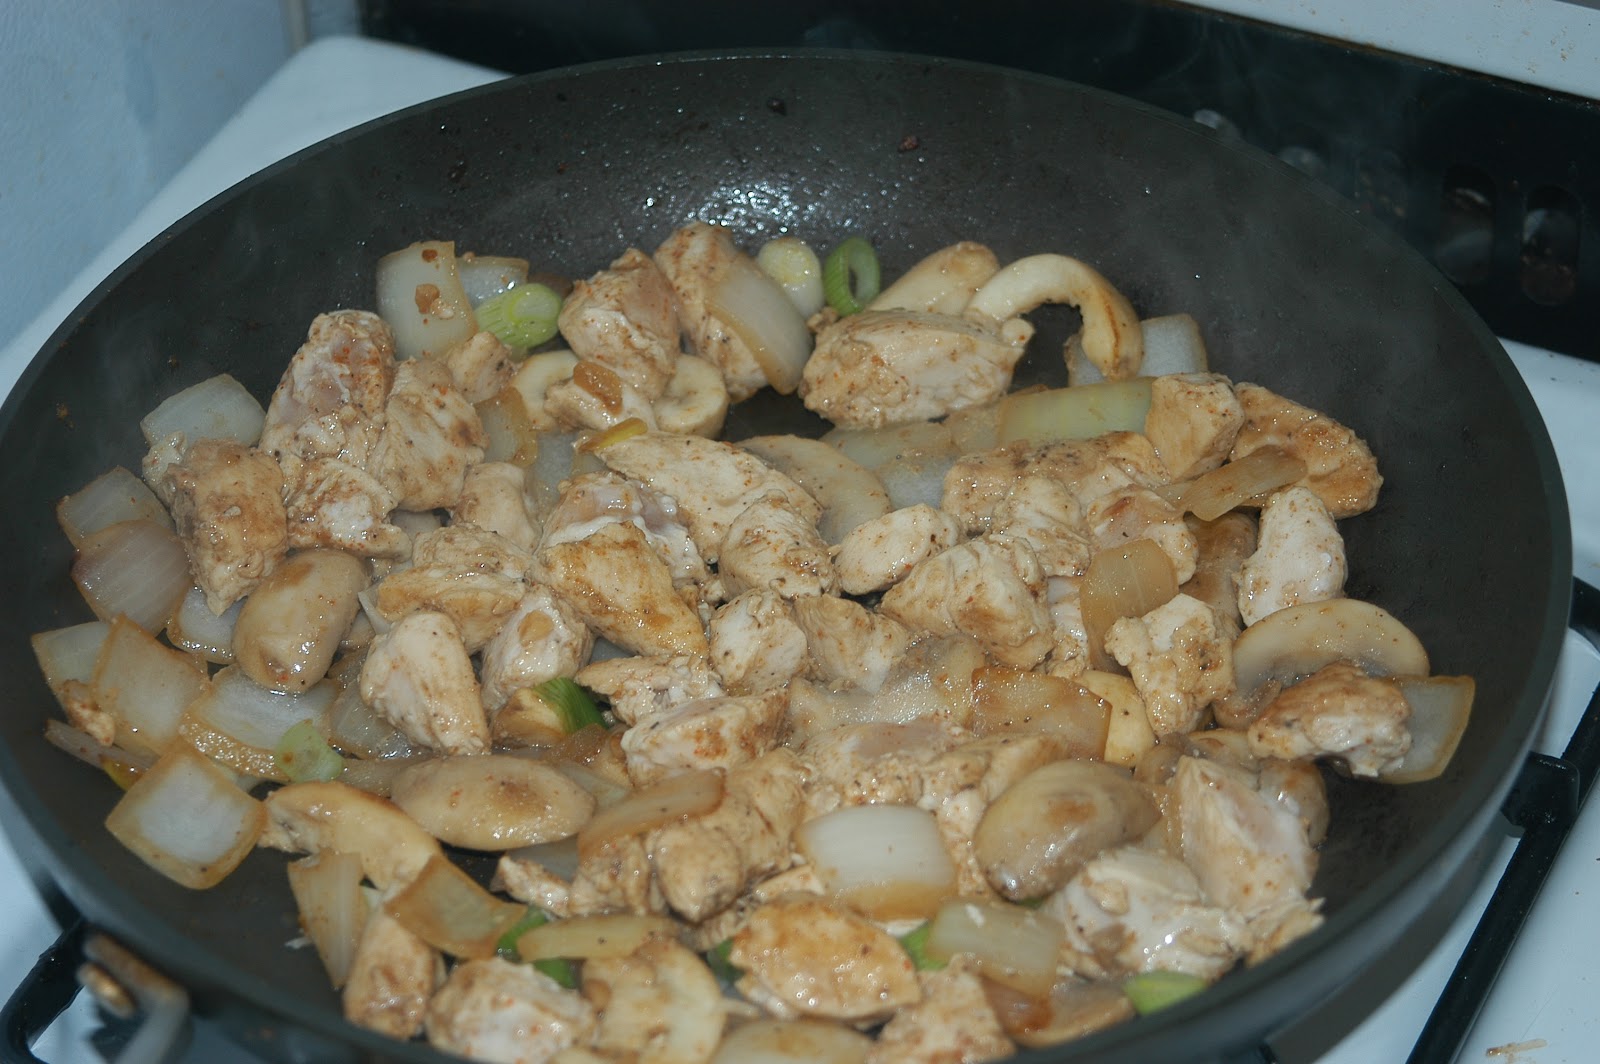
For the chicken, I chopped some yellow onion, mushrooms, scallions, garlic, and chicken breasts.  Add a little olive oil to a skillet, saute the onion, garlic, and mushrooms until softened.  Throw in your chicken.  Now at this point I added my spices: cumin, coriander, cayenne pepper, and ground black pepper. 
I went for cooking over a dry heat with dry spices to mimic the fresh-off-the grill aspect of the halal carts.  I threw the scallions in toward the end to cook a little.  But ultimately, the chicken and veggies were quite darkened and had a nice kick to them. 

I scooped my rice on top of the lovely bed of lettuce showcased above.  Then came the chicken/veggies.  And finally what street food meal is complete with the sauce?  A little googling yieldss mixed theories as to the contents of this sauce.  Some say mayo/vinegar.  Some say cucumber/yogurt.  Our version of the sauce had many black specks in it (and no cucumber to be found), and the taste was reminiscent of ranch dressing.  So use whatever sauces/dressings you like.  The lettuce lets you pretend you're having a salad, while the rice reminds you that you're having a heartier meal. 

Monday, January 16, 2012

Fish Tacos

Typically made with fried fish, this grilled fish variety makes for a lighter version of a delicious mexican inspired taco that always makes me think of San Diego.  We had some tilapia in the freezer and what better way to utilize it than with some cilantro, lime juice, and avocado?

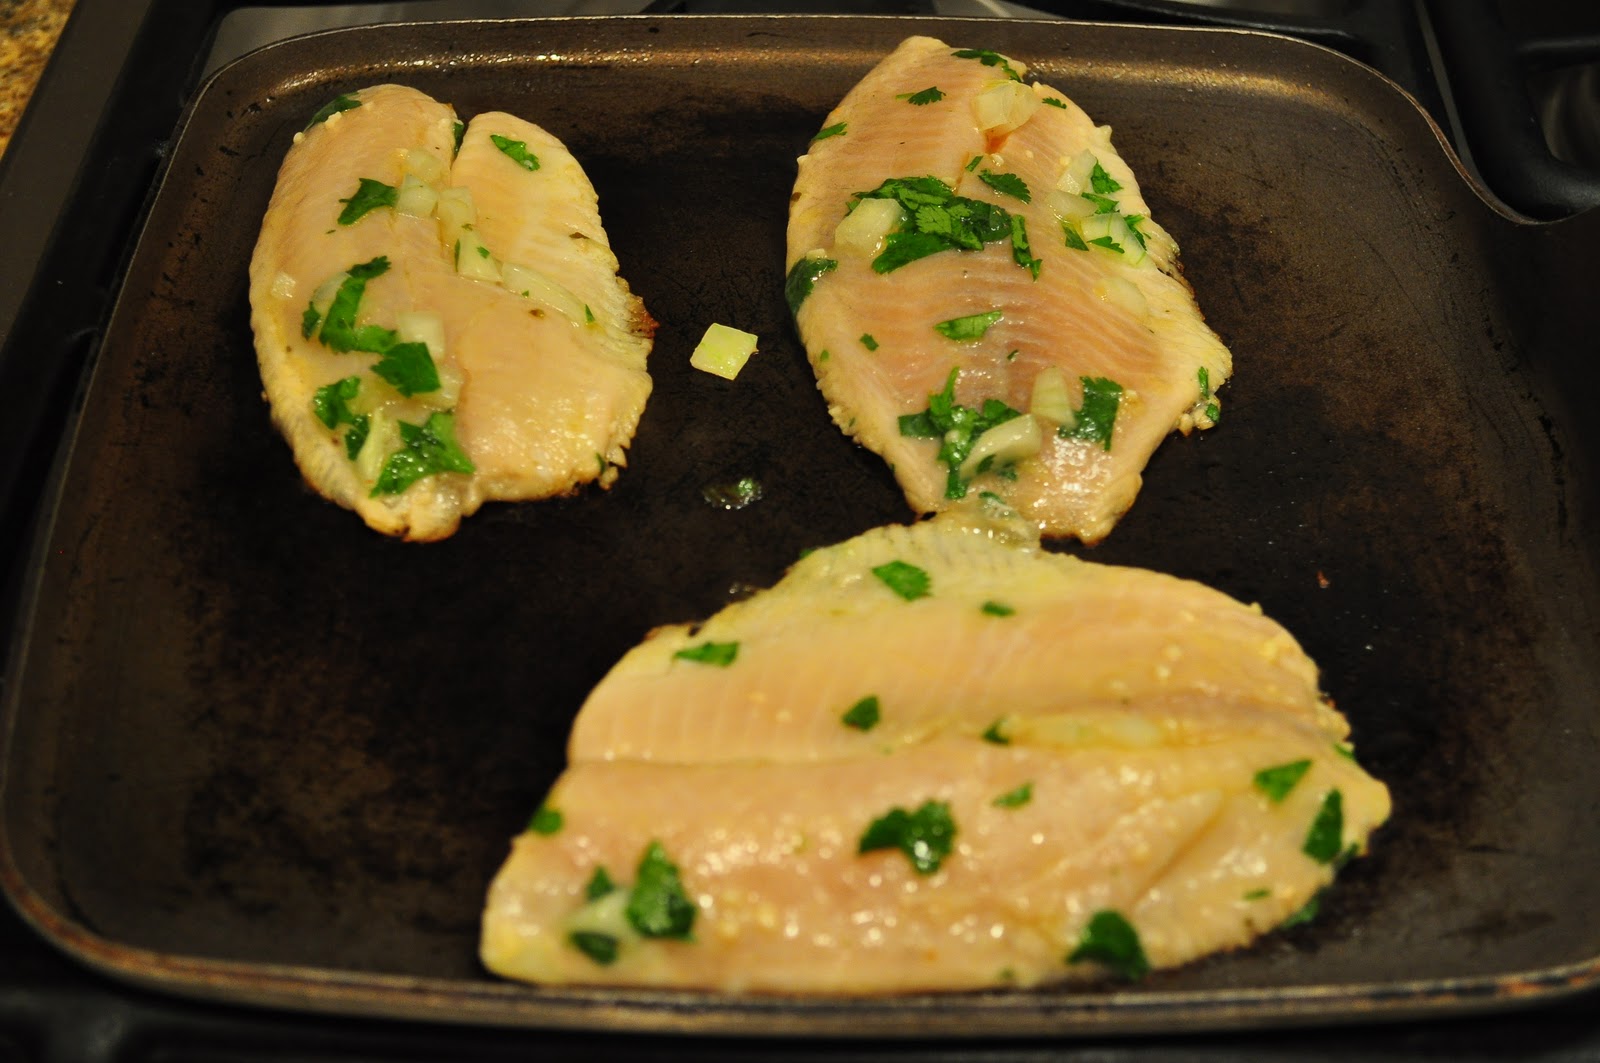
You can marinade your fish with whatever you like, but I opted for my standard ziploc bag filled with diced white onion, chopped cilantro, olive oil, lime juice, orange juice, garlic, oregano, salt, and pepper.  Throw your fish in, put in the fridge and let it sit for 30 minutes to several hours.  
Next, prepare your grill.  If you aren't using a grill, go for a grill pan.  If you are lacking a grill pan, a flat skillet works well too (what I used in this case).  Add a little oil to the skillet and throw on your tortillas.  We opted for small corn tortillas, since these are soft tacos, but if you want flour or crunchy taco shells, by all means, do your thing, but I highly endorse soft tortillas for this meal.
While these are grilling I made a lime mayonnaise with 1 cup mayo, 1 tsp milk, 3 tbsp lime juice, and a dash of the fresh cilantro.  Remove your heated tortillas from the grill/skillet and coat with your desired amount of lime mayo. 
Next, grill your fish on the same pan, with a little excess marinade still suck to the fish.  I'm not really a fan of patting dry, because I don't want to lose the extra flavor.
Since tilapia is a very thin white fish, it will cook rather quickly.  Turn after a couple minutes on one side, and once done, you can break it into smaller pieces to fill your tacos.  I arranged the sliced lettuce on the bottom of the tortilla, topped with the fish, added some fresh avocado, drizzled with about a tbsp of the leftover marinade from the baggy, and topped with a little bit more of the lime mayo. 
Simple, delicious finger food that makes for a good lunch or dinner.

Wednesday, December 7, 2011

Bacon Wrapped Goat Cheese Stuffed Baked Pears

I was recently gifted pears, which is interesting because I'm not so much a pear eater.  I consulted google to determine what I could do with these pears that would possibly appease my fruit-hating palate, and lo-and-behold....bacon was the answer!  Big surprise.  This recipe had the makings of all the things I love: bacon and goat cheese.  The pear became an afterthought, which was fine by me. 

Begin by preheating your oven to 350 F, halve your pears, and remove the pits, leaving a nice bowl for your cheese.  Place the pear halves on a cookie sheet, fill the scooped out insides with herbed goat cheese, and wrap with raw bacon.  So maybe the recipe calls for a single slice of bacon, but obviously that wasn't enough, so I went for two. 
Drizzle the pears with a little olive oil and salt and pepper and bake for about 30 minutes (more or less depending on pear size). 
Once done, serve over a bed of greens.  I used mesclun, but you can also use arugula or whatever you prefer.  We made a mild vinaigrette to drizzle over the lettuce before we topped with the pears and drizzled with a little honey.  The juices from the pears, the fat from the bacon, and the sweetness of the honey actually combined pretty well with the greens and cheese and made for a surprisingly delicious pear salad...though that could be all the bacon's doing. 

I had some leftovers so I reheated the pears in the toaster oven to re-crisp the bacon, and one morning I served this for breakfast over a fried egg.  Not bad for a fruit. 

Sunday, July 17, 2011

Quinoa Salad with Shrimp

What?  Salad for dinner again? Yeah, don't worry, I'm not turning healthy, as evidenced by the bacon overload.  But the first time I sampled quinoa it was in a salad and I was sold, so rather than serve it as a side dish, I present to you quinoa as the main event.  Perhaps this would make a great lunch salad.

This one is pretty simple.  As you may be able to tell, I was lacking in the lettuce department, so it's heavy on the quinoa, light on the greens.  I cooked the quinoa in chicken broth and threw the raw shrimp and frozen corn kernels into the pot to cook together.  I created a dressing with olive oil, red wine vinegar, salt and pepper, and cilantro.  To that I added the cooked quinoa, shrimp, and corn and mixed to coat.  I added the lettuce, chopped red onion, herbed goat cheese, and of course the crumbled bacon.  And there you have it.  Add quinoa to any of your favorite salads and you'll get a nice texture addition.  Though you probably want to add a lot less than I did if you're just using it as an accent flavor.  

Saturday, March 26, 2011

Shrimp, Bacon, and Goat Cheese Salad

It apparently came as a shock to most of my friends and family that i made a salad for dinner last night.  Ok, it shocked me too.  But i have so much leftover lettuce that's going bad!  So what do you add to vegetables to make them taste better?  Bacon! 

I'm pretty sure you don't need my help knowing how to make a salad, but this is what I put in it:  shrimp (poached like in the previous blog entry), bacon, diced shallot, corn, and a mix of fresh baby greens.  I made the dressing with 2 parts extra virgin olive oil to 1 part red wine vinegar, and whisked with salt and pepper and some freshly chopped basil.  Pour the dressing over the salad, toss, and at the end add the goat cheese and toss once again.  (The goat cheese is what makes the dressing in the above picture look more like a ranch, because I tossed it too much and it lost it's individual clumps...still delicious though.)

The magic touch, however, was when I scooped the bacon onto the lettuce, I didn't drain first on paper towels.  That way some residual bacon grease ended up wilting the greens, and in my opinion really improving their taste.  

Wednesday, March 23, 2011

Open Faced Shrimp Melt

Okay, so I realize this is very similar to the shrimp melts I posted a couple months ago, but it was so delicious last night that I felt the need to document and share.  This turns the appetizer portion into a meal.  Add whatever you like on your sandwich, and use two slices of bread if you want.

Ingredients: Shrimp, tarragon, white wine, water, scallions, mayo, lettuce, bacon, bread, cheddar cheese

First, prepare the shrimp.  Always start with raw shrimp.  It's cool if the shrimp is frozen, as long as it isn't cooked already.  That produces the best texture and taste.  I poach the shrimp in a 1:1 mixture of white wine and water with about a tsp of dried tarragon over medium heat.

I left the tails on for the poaching, but you don't have to.  After about a minute or two on each side, your shrimp should be cooked through.  Remove from the poaching liquid and set aside to cool.  Once cool, remove tails and chop into thirds.

Meanwhile, cook your bacon, toast your bread, and prep your lettuce.  Thinly slice a scallion and add it to a mixing bowl.  Add the chopped shrimp to the scallions and coat both with mayonnaise.  Use as much or as little as you like.  I probably used 1 to 2 tbsp.  Add a little salt and pepper and if you want more tarragon you can add that too.  A splash of lemon juice or chives are also suitable additions.

Assemble the sandwich.  Bread.  Lettuce.  Bacon.
Now it is up to you how you want to melt the cheese on your sandwich.  I usually put the shrimp mayo mixture on top of the bacon and coat with grated cheddar cheese, then place the entire sandwich in a toaster oven to melt the cheese.  Last night I instead opted to heat just the shrimp with the cheese on top so as to not cook the toast, lettuce, or bacon any more.  Once the cheese was melted, I scooped the cheesy shrimp on top of the bacon.


I ate with my hands, but obviously if you're classy you'll use utensils.  I'd also suggest throwing some avocado on top, but I alas did not have any.  Ideally, I would serve this on a dutch crunch roll, but the shrimp is so good it can work with whatever bread you give it.

Wednesday, December 22, 2010

Chicken Lettuce Wraps

  
Another produce item in the fridge just asking to be used before it goes bad (again thanks to the roommate's CSA) so I was inspired to make lettuce wraps!  More sauces/ingredients would have been ideal (like hoisin, water chestnuts, carrots), but you work with what you've got when it's dinner time and you're not up for a trip to the store.  

So this rendition of lettuce wraps included: chicken (4 breast tenders) diced, sesame oil, 2 cloves garlic minced, 1/4 cup diced red onion, ~1/4 cup soy sauce, 1 tsp brown sugar, dash of lemon juice, 1 tsp corn starch

Begin by sauteing the garlic and onion (and potentially any other veggies you have) in a skillet covered in a thin layer of sesame oil (~1 tbsp or so).  
Once suitably softened add your chicken.  You want to saute but also potentially get a little bit of crisp from the oil.  
Once cooked through, push the meat and veggies to the side and add the brown sugar to the pan and a tbsp of the soy sauce.  Stir in place to completely dissolve the brown sugar into the soy sauce, then stir with the rest of the chicken/veggies.  

Add other sauces if you have any (teriyaki, hoisin, oyster).  Again, pushing the meat to the side of the pan, add the corn starch to the skillet and some more soy sauce.  Mix thoroughly and watch as the sauce thickens.  Add your desired amount of soy sauce.  Splash with a little lemon, and when done, spoon into the lettuce (ideally Bibb, but use whatever you have).  And most importantly, make sure to eat with your hands!

Thursday, August 26, 2010

LND: Lunchbox Edition

The art of the homemade deli sandwich.  The bread is truly the key ingredient.  I'm a fan of dutch crunch myself, but since I buy sliced loaves rather than rolls for typical home consumption, I opt for a sourdough or similar option with a nice crust and firmer interior.  The bread du yesterday was a Tuscan Pane found at Trader Joe's.  Big fan.

The second most important part is the meat.  Not only the quality of the deli slices you've procured, but the placement in the sandwich.  Far too often I've ordered a deli sandwich and the slices of meat are all stuck together one on top of the other.  Ok, sure it may be the same meat, but I swear it tastes better when the deli slices are folded over themselves (almost like loosely rolled bundles) creating pockets of air between meat slices.  Trust me, it makes a world of difference.  

Next order of business: sauces/condiments.  For yesterday's sandwich I used mayonnaise on one slice of bread and a homemade feta/onion/mint sauce on the other slice of bread (ok, maybe a little bit off-putting for some, but I'm trying to use up my leftovers here).

Finally, you may begin assembly.  I start by partially toasting the bread, coating with the mayo/yogurt sauce, then piling.  Roast beef, bacon, and gruyere cheese go on one side. Lettuce on the other.  If i had had more ingredients in my pantry i could've gone to town: avocado, tomatoes, red onions, so on and so-forth, but i had to suffice with a meat-hearty meal.  I put the portion with the cheese in the toaster oven, to melt the cheese atop the bacon and beef.
Assembled, sliced, wrapped and ready for lunch.  When I'm ready to eat, I put it in the toaster oven at work to remelt the cheese and warm the meats just a little bit.  Fresh deli taste from my home kitchen.