Thursday, March 31, 2011

Enchiladas

This was my first foray into enchilada making, and I wanted to make everything from scratch, including the enchilada sauce. I never really knew what went into the sauce, but now I'm pretty much an expert.  And yes, they were delicious so I will make these many more times in the future.

The roommate and I made these the other night at midnight.  Perhaps we are insane, but midnight enchiladas are something everyone should try at least once.  And they reheat well too, making for good lunch the next day. 

For the sauce, I basically followed this recipe.  I heated oil in a saucepan, added the flour, then added the chili powder.  I didn't have any chicken stock or broth, so I ended up just using water.  And instead of having ten ounces of tomato paste, I only had six.  But I did have oregano and cumin!  So this is what it looked like:
While the sauce simmered and thickened, it was time to prep the filling.  First we sauteed 1 tbsp garlic with 1 chopped shallot in a little olive oil.  Once nicely softened and lightly browned I added the corn.  
After about a minute to heat through I added a can of diced tomatoes.  I then washed, peeled, and sliced the raw shrimp into halves and added the raw shrimp to the skillet.  After about five minutes the shrimp were pink and the filling was ready.


Now I apologize for the lack of pictures at this point.  It was midnight. I forgot about my camera while my hands were coated in enchilada sauce, but just pretend you can see what I did next.  First coat the bottom of your baking dish with some of the enchilada sauce.


Microwave the tortillas for half a minute to a minute to soften them and prepare them to be rolled.  We in total used five flour tortillas.  Coat the tortillas on both sides with a thin layer of enchilada sauce.  We did this on a plate so as not to make too much of a mess elsewhere.  We then sprinkled fresh monterey jack cheese over the inside of the tortilla.  Next, scoop about 1/2 cup of the filling into the center of a tortilla.  Roll/fold the tortilla to encase the stuffing, and place into the baking dish, seam side down.  Repeat for the rest of your tortillas.  Once your baking dish is full, cover the enchiladas with the remaining enchilada sauce.

Sprinkle shredded cheddar cheese generously on top and bake in a preheated 350 degree oven for 15 minutes.  
A peak inside the enchiladas after coming out of the oven
Sprinkle freshly chopped scallions and cilantro on top of the enchiladas once out of the oven.  When serving, add a dollop of sour cream, or perhaps some guacamole/avocado and enjoy your midnight fiesta!

Monday, March 28, 2011

Taco Bake

This is another recipe my mother used to make a lot.  It's fairly simple, but it's quite good thanks to the combination of flavors and textures.  It would probably be easy to make a vegetarian version of this.  I'd suggest a can of chopped tomatoes, zucchini, black or pinto beans, and any other vegetables you enjoy with Mexican flavors.  But for you meat-eaters out there, go for the ground beef.

Ingredients: 1.25 lbs ground beef, 1 can tomato sauce, 12 oz corn, 1 packet taco seasoning, 1/4 cup water, 1 box Jiffy corn muffin mix (1 egg and milk for the corn muffin mix), 1 can French's french fried onions, 1/2 cup cheddar cheese

Preheat oven to 350 degrees.  Start by browning the ground beef in a skillet.  Once cooked, drain most of the fat and add the packet of taco seasoning and water.  Add the corn and the can of tomato sauce and mix.  Once heated through, pour mixture into the bottom of a casserole dish.
Prepare the corn muffin mix according to package directions.  Mix in 1/2 can of the french fried onions.  Spoon atop the ground beef mixture in the casserole dish, creating a box around the center.  The corn muffin mix will expand as it bakes, so this technique should yield even cooking.
Bake for 20 minutes.  At this point, open the oven and sprinkle the remaining french fried onions and the shredded cheddar cheese on top.  Bake for another 2 minutes until the cheese melts.  Remove from the oven, scoop, and serve.

Saturday, March 26, 2011

Shrimp, Bacon, and Goat Cheese Salad

It apparently came as a shock to most of my friends and family that i made a salad for dinner last night.  Ok, it shocked me too.  But i have so much leftover lettuce that's going bad!  So what do you add to vegetables to make them taste better?  Bacon! 

I'm pretty sure you don't need my help knowing how to make a salad, but this is what I put in it:  shrimp (poached like in the previous blog entry), bacon, diced shallot, corn, and a mix of fresh baby greens.  I made the dressing with 2 parts extra virgin olive oil to 1 part red wine vinegar, and whisked with salt and pepper and some freshly chopped basil.  Pour the dressing over the salad, toss, and at the end add the goat cheese and toss once again.  (The goat cheese is what makes the dressing in the above picture look more like a ranch, because I tossed it too much and it lost it's individual clumps...still delicious though.)

The magic touch, however, was when I scooped the bacon onto the lettuce, I didn't drain first on paper towels.  That way some residual bacon grease ended up wilting the greens, and in my opinion really improving their taste.  

Wednesday, March 23, 2011

Open Faced Shrimp Melt

Okay, so I realize this is very similar to the shrimp melts I posted a couple months ago, but it was so delicious last night that I felt the need to document and share.  This turns the appetizer portion into a meal.  Add whatever you like on your sandwich, and use two slices of bread if you want.

Ingredients: Shrimp, tarragon, white wine, water, scallions, mayo, lettuce, bacon, bread, cheddar cheese

First, prepare the shrimp.  Always start with raw shrimp.  It's cool if the shrimp is frozen, as long as it isn't cooked already.  That produces the best texture and taste.  I poach the shrimp in a 1:1 mixture of white wine and water with about a tsp of dried tarragon over medium heat.

I left the tails on for the poaching, but you don't have to.  After about a minute or two on each side, your shrimp should be cooked through.  Remove from the poaching liquid and set aside to cool.  Once cool, remove tails and chop into thirds.

Meanwhile, cook your bacon, toast your bread, and prep your lettuce.  Thinly slice a scallion and add it to a mixing bowl.  Add the chopped shrimp to the scallions and coat both with mayonnaise.  Use as much or as little as you like.  I probably used 1 to 2 tbsp.  Add a little salt and pepper and if you want more tarragon you can add that too.  A splash of lemon juice or chives are also suitable additions.

Assemble the sandwich.  Bread.  Lettuce.  Bacon.
Now it is up to you how you want to melt the cheese on your sandwich.  I usually put the shrimp mayo mixture on top of the bacon and coat with grated cheddar cheese, then place the entire sandwich in a toaster oven to melt the cheese.  Last night I instead opted to heat just the shrimp with the cheese on top so as to not cook the toast, lettuce, or bacon any more.  Once the cheese was melted, I scooped the cheesy shrimp on top of the bacon.


I ate with my hands, but obviously if you're classy you'll use utensils.  I'd also suggest throwing some avocado on top, but I alas did not have any.  Ideally, I would serve this on a dutch crunch roll, but the shrimp is so good it can work with whatever bread you give it.

Tuesday, March 22, 2011

Tarragon Potato Latkes with Smoked Salmon and Sour Cream

This was last night's dinner, but I'd recommend it for brunch.  This is a very simple potato latke recipe, so if you have another that you prefer, keep doing what you're doing. 

Ingredients: 2 potatoes, 1 shallot or 1/2 a small onion, 1 egg, 1 tbsp flour, 1 tsp dried tarragon or 2 tbsp fresh tarragon, salt and pepper
Toppings: smoked salmon, sour cream or creme fraiche, tarragon to garnish

Begin by grating the potatoes, I used russet, and the onion or shallot with a coarse cheese grater.  Place grated potato in a dish towel and ring out all the water.  Place potato and shallot in a bowl.
The potato may start to turn color, so you can add a splash of lemon juice if you aren't able to work quickly and tend to the potatoes immediately.  Next, whisk your egg and add it to the bowl, followed by the flour.  Once mixed, season with salt, pepper, and tarragon.

Heat a thin layer of olive oil in a skillet.  Form potato mixture into little balls and place in heated oil over medium to medium/high heat.  Press down to flatten.  Cook about 3 minutes on one side then flip over.  Continue cooking until you've reached your desired level of brown doneness. 
Once cooked, you may drain on a paper towel, or not if you don't care about a little residual oil.  Top with a dollop of sour cream, any amount of smoked salmon you want, and a sprinkle of tarragon.

Sunday, March 20, 2011

Corn Fritters

I attended a potluck last weekend and decided to try a new recipe to take as my contribution.  My friend was making jambalaya, so I opted to try my hand at corn fritters.  I found a recipe, which I immediately strayed from, and this is what I came up with.

Ingredients: 1 box Jiffy Corn Muffin Mix, 1 egg, 1/2 cup sour cream, 1/3 cup milk, 3/4 cup corn kernels
Fried in Vegetable oil

So the recipe I found called for stone ground corn meal, but I've been a user of Jiffy corn muffin mix my whole life, and I couldn't find stone ground corn meal at the grocery store.  To the box of corn muffin mix I added the egg, milk, and sour cream and mixed well. 
I then added the corn kernels, thawed from the freezer bag they were in, and let sit in the mix for at least 15 minutes before frying. 
At this point I filled a skilled with vegetable oil, about 1/2 to 3/4 inch deep.  I heated the oil on medium heat, and by the time my batter sat for about fifteen minutes, the oil was hot enough to sizzle when I added a dollop of batter.  Now frying is tricky because oil that is too hot will burn your fritters, but oil that is too cold won't cook them through and they'll fall apart when they hit the oil. So heat the oil on medium and adjust when you start adding the fritters, hotter or cooler depending on how fast they are browning. 

Using an ice cream scoop, melon baller, cookie dropper, or spoon, drop balls of the cornmeal mix into the hot oil.  Let fry about a minute and a half on one side, then turn over and go for a minute and a half on the other.
You'll notice the golden brown indicates it is cooked on the outside, but to ensure a fully cooked interior, you can cook for another 1 to 3 minutes turning over every so often.  But really the best way to test how long you need to fry them is to to cut one open and try it for yourself.

Once properly fried, place on a wire rack over a cookie sheet to drain the oil and later on paper towels to sop up any extra oil.  You can eat these on their own, or serve with a salsa or sauce of your choosing. 

Saturday, March 12, 2011

Cornish Game Hens with White Rice and Bacon

This recipe has been a mainstay for family dinners for as long as I can remember.  The best part about this is the rice.  It's buttery on the bottom of the baking dish, but the rice on the top gets crunchy and it's pretty fabulous. My mother hates to cook, but she makes good food, and this recipe is one she's perfected.  A quick phone call the other day to ask for proportions and tips, and we were ready for our feast. 

Ingredients: cornish game hens, white rice, butter, onions, salt/pepper, bacon
Preheat oven to 350 degrees.  

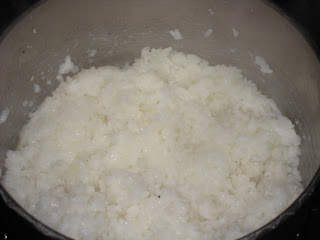
This is a pretty simple dish, and you can obviously spice it up if you want other flavors, but we were going for simplicity.  So first, prepare the rice according to package directions.  I used long grain white rice, but you can use any rice you prefer.  I made 1 1/2 cups of rice which yielded 3 cups since my baking dish couldn't hold too much more than that.  For the last 5 minutes of cooking i added diced onions and a tablespoon of butter to the rice. 
When the rice is ready, spread about 1/3 of it on a baking dish.  Stuff the birds with some rice and place them on top of the rice in the baking dish. Fill the rest of the rice in the open areas of the baking dish. 
Now, butter these guys up.  Rub the birds with butter and place little cubes on/in the rice.  I used about 2 tbsp total for this part, but in retrospect I could have used more.  The final, though maybe unnecessary touch, is to drape a slice of bacon across the breast of each hen.  As we know, everything tastes better with bacon, and this adds a nice extra flavor.  But you certainly can roast these hens without it. 
Finally, season with salt and pepper, put in the oven, and bake for about an hour to an hour and a half.  I went for the longest time, just to make sure everything was cooked through, and the butter helped keep things moist.  To serve we typically cut the hens in half with kitchen shears and pile on the rice.